Setting up an IIoT Gateway - Generation 3
This guide helps you setting up a gateway to use with the Connectitude IIoT Platform™.
Please read the reference guide for more in-depth details.
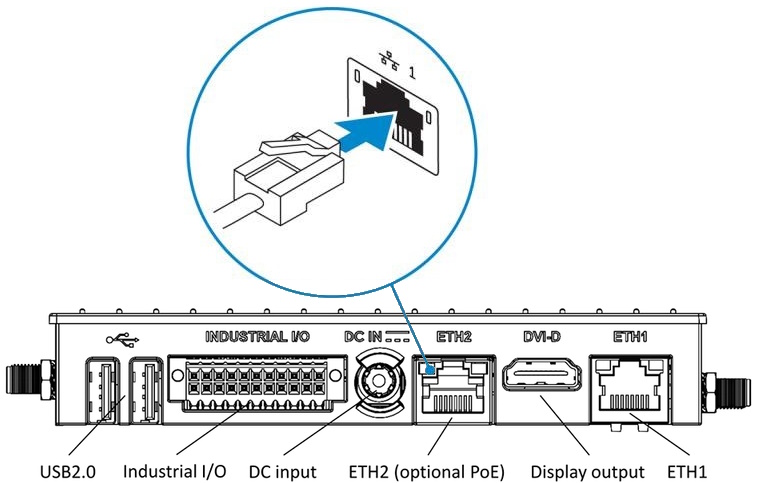
Incorrect port names on chassis
The ethernet port naming on the chassis is reversed, port 1 (cloud network) is actually marked with ETH2 and port 2 (machine network) is marked with ETH1.
Connect to Internet - Using an ethernet connection
-
Connect an ethernet cable with Internet access to the cloud network on ethernet port 1 (ETH2), which also supports PoE.
-
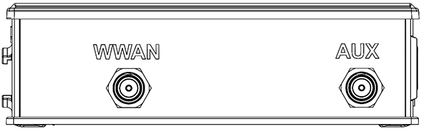
Connect the necessary antennas depending on the configuration ordered (optional).
Connector Function WiFi-A / BT Wifi / Bluetooth antenna WiFi-B Secondary Wifi antenna WWAN Main LTE antenna AUX Auxiliary GNSS antenna 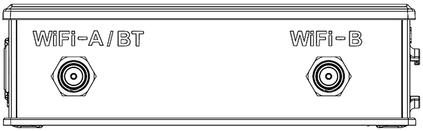
-
Power the IIoT Gateway using the supplied DC terminal block adapter connected to a 24-36V PSU, or by using an appropriate PSU output supplying 12VDC 3A. PoE is also possible on ethernet port 1 (ETH2).
Connect to Internet - Using a mobile broadband connection
Prerequisites
-
Before you power on the IIoT Gateway, insert a nano-SIM card into the SIM-card slot.
-
Ensure that the service provider has already activated the micro-SIM card before you use it in the IIoT Gateway.
-
Ensure that the pin code is removed from nano-SIM card before you use it in the IIoT Gateway.
-
Power off the IIoT Gateway.
-
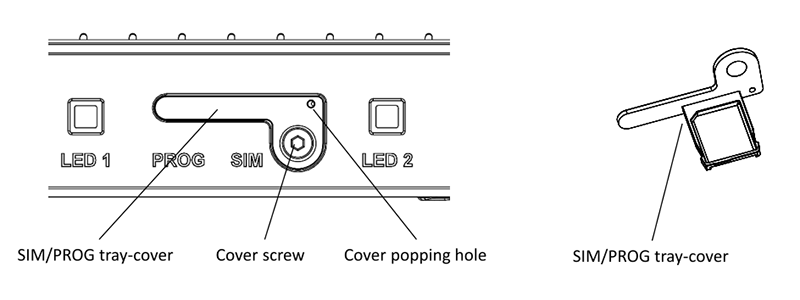
Remove the screw from the SIM/PROG tray-cover.
-
Insert a SIM removal tool into the cover popping hole to pop the tray-cover.
-
Place the nano SIM card, without any PIN-code, into the tray.
-
Carefully push the tray-cover back in.
-
Close the SIM/PROG cover screw.
-
Power on the IIoT Gateway.
-
The gateway will automatically try to identify the correct APN settings, if publicly available, and create a connection.
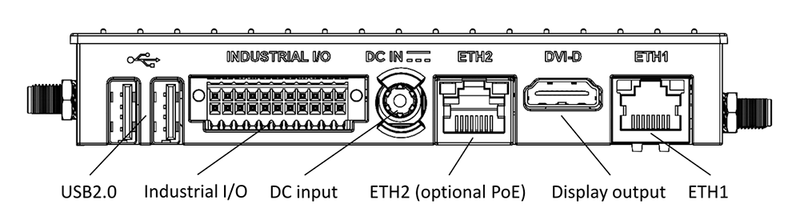
Connect the machine network
-
Connect an ethernet cable with access to the LAN used for PLCs, for example, to the machine network on ethernet port 2 (ETH1).
