Setting up an IIoT Gateway - Evaluation
This guide helps you setting up a gateway to use with the Connectitude IIoT Platform™.
You need the following items to get started:
• A Raspberry Pi 4
• An SD-card loaded with the Connectitude IIoT Platform software™ (included)
• A Raspberry Pi 4 power supply (included)
• A device with a WiFi network adapter such as a smartphone, tablet, PC, Mac or Chromebook with a recent web browser (Chrome preferred).
• A known internet connected WiFi Network with a known SSID and PSK (password) to connect to.
The physical ethernet port on the Raspberry Pi is supposed to be used to connect controllers PLCs and other industrial devices for communication with the Connectitude IIoT Platform™.
Limitations
The Access Point (hotspot) on the Raspberry Pi 4 remains active for approximately 1 hour, and is only active if the Raspberry Pi 4 is unable to join a previously working WiFi network.
Quickstart
In the next section we will go through the steps in more detail, but the basic steps are as follows:
-
Power up the Raspberry Pi 4.
-
Find the Access Point (Wifi network) that the Raspberry Pi provides (serial number of RPI4).
-
Log in to the provided WiFi network use, iiot1234 if asked for a password/PSK.
-
Go to the configuration page of the Raspberry Pi http://10.42.0.1/setup and configure the WiFi network that the Raspberry Pi 4 will use for cloud connectivity.
-
Done.
Detailed-step-by-step guide
Below you’ll find a bit more in depth guide to how to configure the Raspberry Pi 4.
Power up the Raspberry Pi
Connect the USB-C end of included Raspberry Pi power adapter to the power socket on the Raspberry Pi 4. Plug in the mains connector to a spare power outlet.
Find the network that the Access Point in the Raspberry Pi 4 supplies
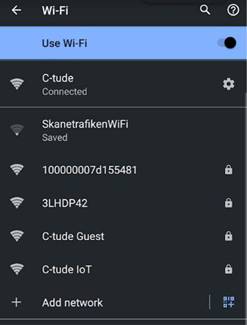
Go into the settings for WiFi networks on your device, and look for a network with a name that consists of 16 hexadecimal numbers, something like: 100000007d155481
On an Android smartphone it looks like this:
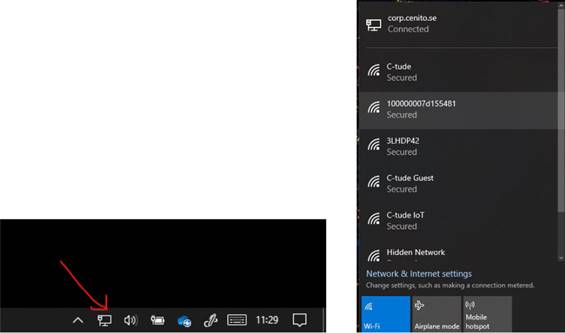
On a Windows 10 PC, it looks like this:
Log in to the WiFi network provided by the Raspberry Pi 4 Access Point
On a smartphone or tablet simply select the WiFi network and enter the security key “iiot1234” when asked.
On a Windows 10 PC, click on the network, click on the “Connect using a security key instead” and use the security key “iiot1234” and click Next.
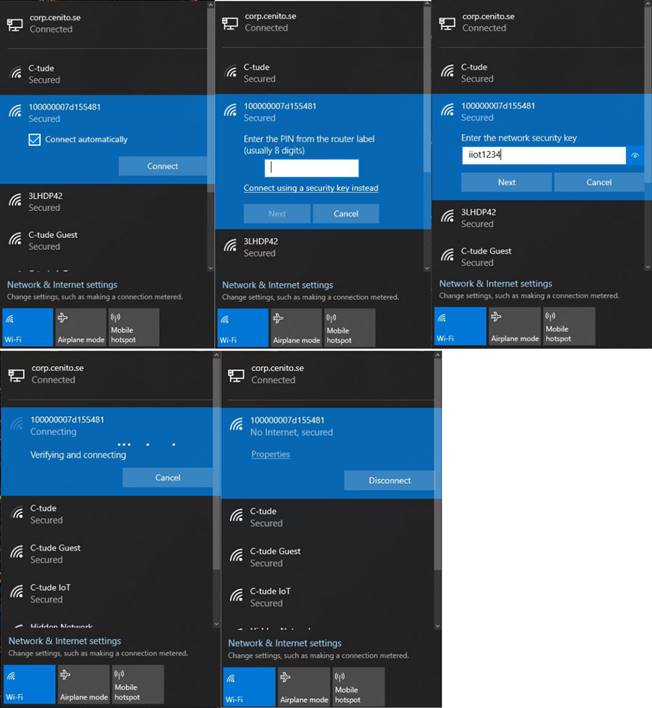
You are now directly connected to the Raspberry Pi 4 and can proceed to configure it.
Configure the Raspberry Pi from the configuration page
After connecting to the Access Point provided by the Raspberry Pi 4, open a browser and point it to:
http://10.42.0.1/setup
After a little while, you are presented with the configuration page:
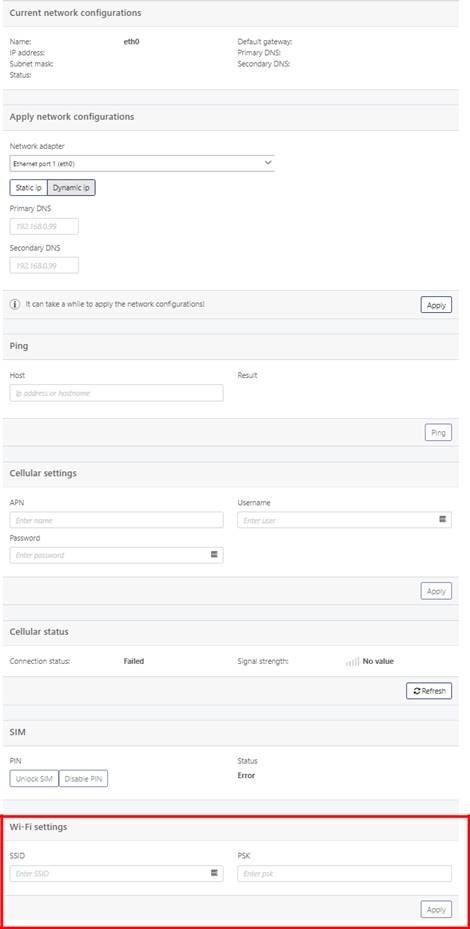
Scroll down to the WiFi settings part of the configuration page
On a smartphone the user interface looks something like this:
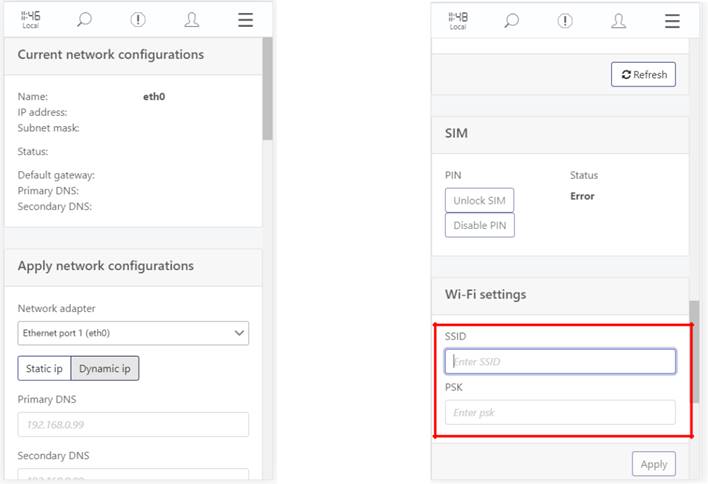
Scroll down to…
In the SSID box, enter the name of the WiFi network you want the Raspberry Pi 4 to use for connecting to the Cloud.
Note that it is very important that the name you enter is the same as the network you want to connect to. The name is case sensitive and if there are spaces or other characters in the name they must be entered as well.
In the PSK box, enter the PSK or password for the WiFi network.
When done, click the Apply button, a dialog box will show up:
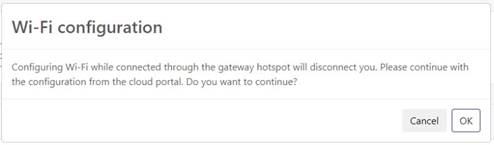
Double check the SSID and PSK and click OK.
After you click on the OK button the user interface will freeze for a short while, and the Raspberry Pi will reconfigure the WiFi adapter and connect to the specified WiFi network.
Your device will disconnect form the Raspberry Pi 4 and the following error will show up:

The Raspberry Pi 4 is now connected to the specified WiFi Network, and will within five minutes show up in the Connectitude IIoT Platform™. If this does not happen, try restarting the Raspberry Pi 4 by power-cycling it.
Troubleshooting
Things to check on, if you run into problems.
The Raspberry Pi 4 Access Point network doesn’t show up.
Make sure that the SD card is properly seated and that the indicator LEDs on the Raspberry Pi 4 are lit.
The Raspberry Pi 4 Access Point does not disappear after you’ve clicked OK in the last step.
This means that the Raspberry Pi 4 was unable to connect to the WiFi network you entered, repeat the setup process and verify that the SSID and PSK of your WiFi network is correct.
portal.connectude.com Raspberry Pi 4 doesn’t indicate that the device is on-line.
It can take up to ten minutes for the device to show up after the configuration is done.
If it does not show up, try power-cycling the Raspberry Pi 4.
How can I review my settings directly on the Raspberry Pi 4?
You can access the configuration user interface by navigating to the webpage at:
http://the IP of your Raspbery Pi 4/setup
Disclaimer
It is important that you always test and verify the functionality of the application before using it in an industrial environment.