Classify Stops
By coding the interruptions that occur, one can identify bottlenecks in production and gain insights contributing to increased efficiency. The operator dashboard features functions for real-time stop classification.
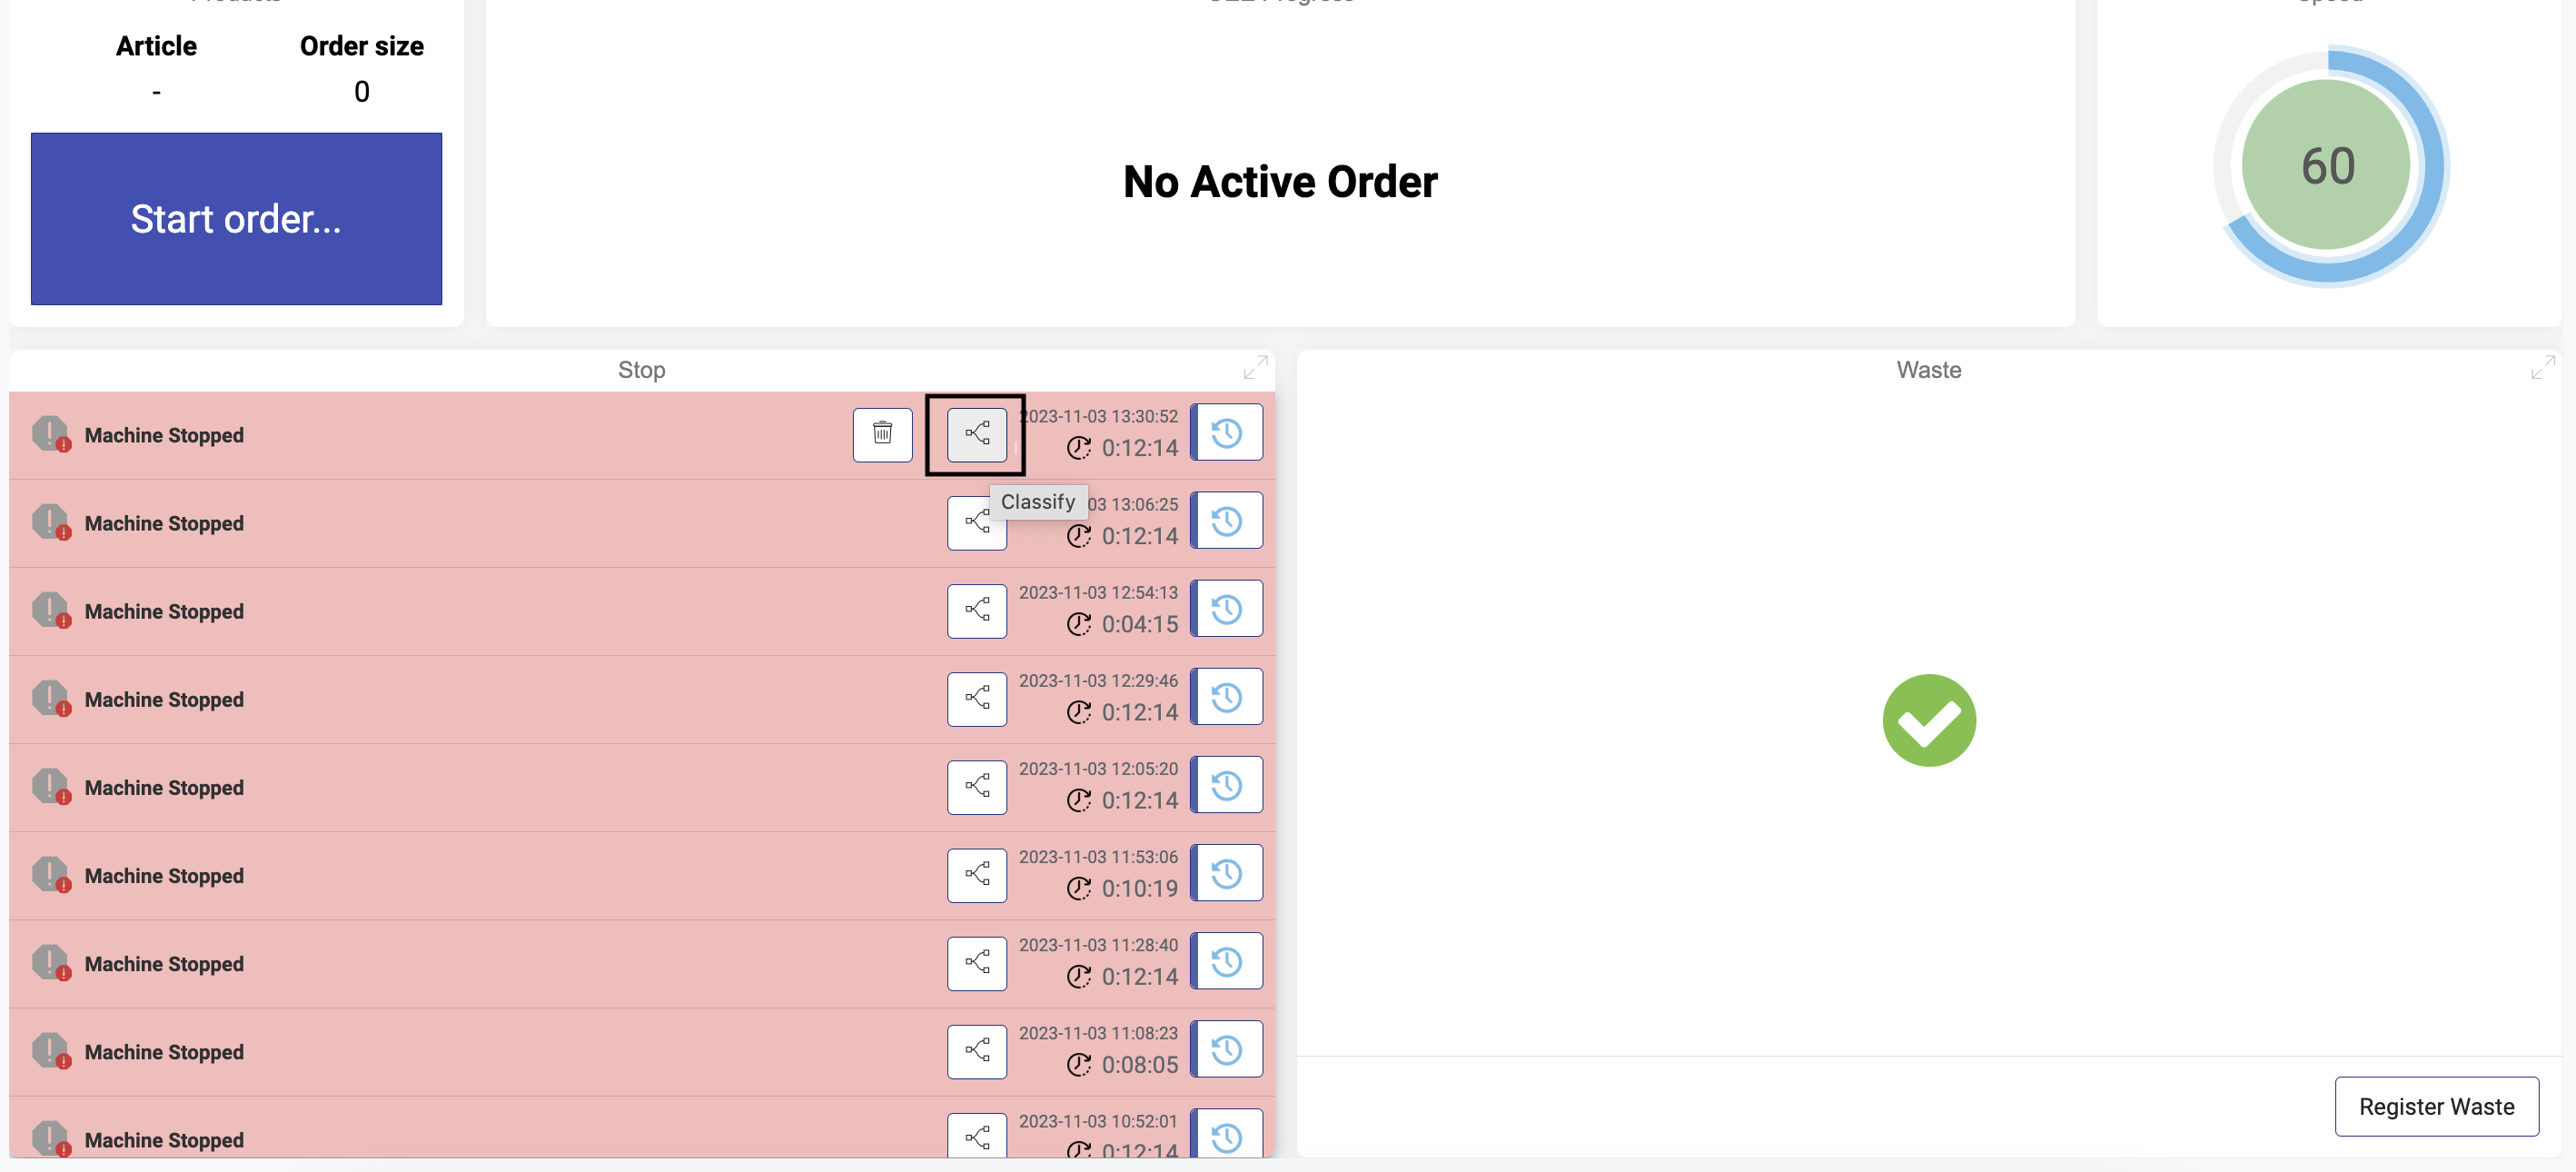
Open the classification dialogue by clicking the icon on the stop you want to classify. If all stops are classified, this dialogue will pop up when the next stop occurs.
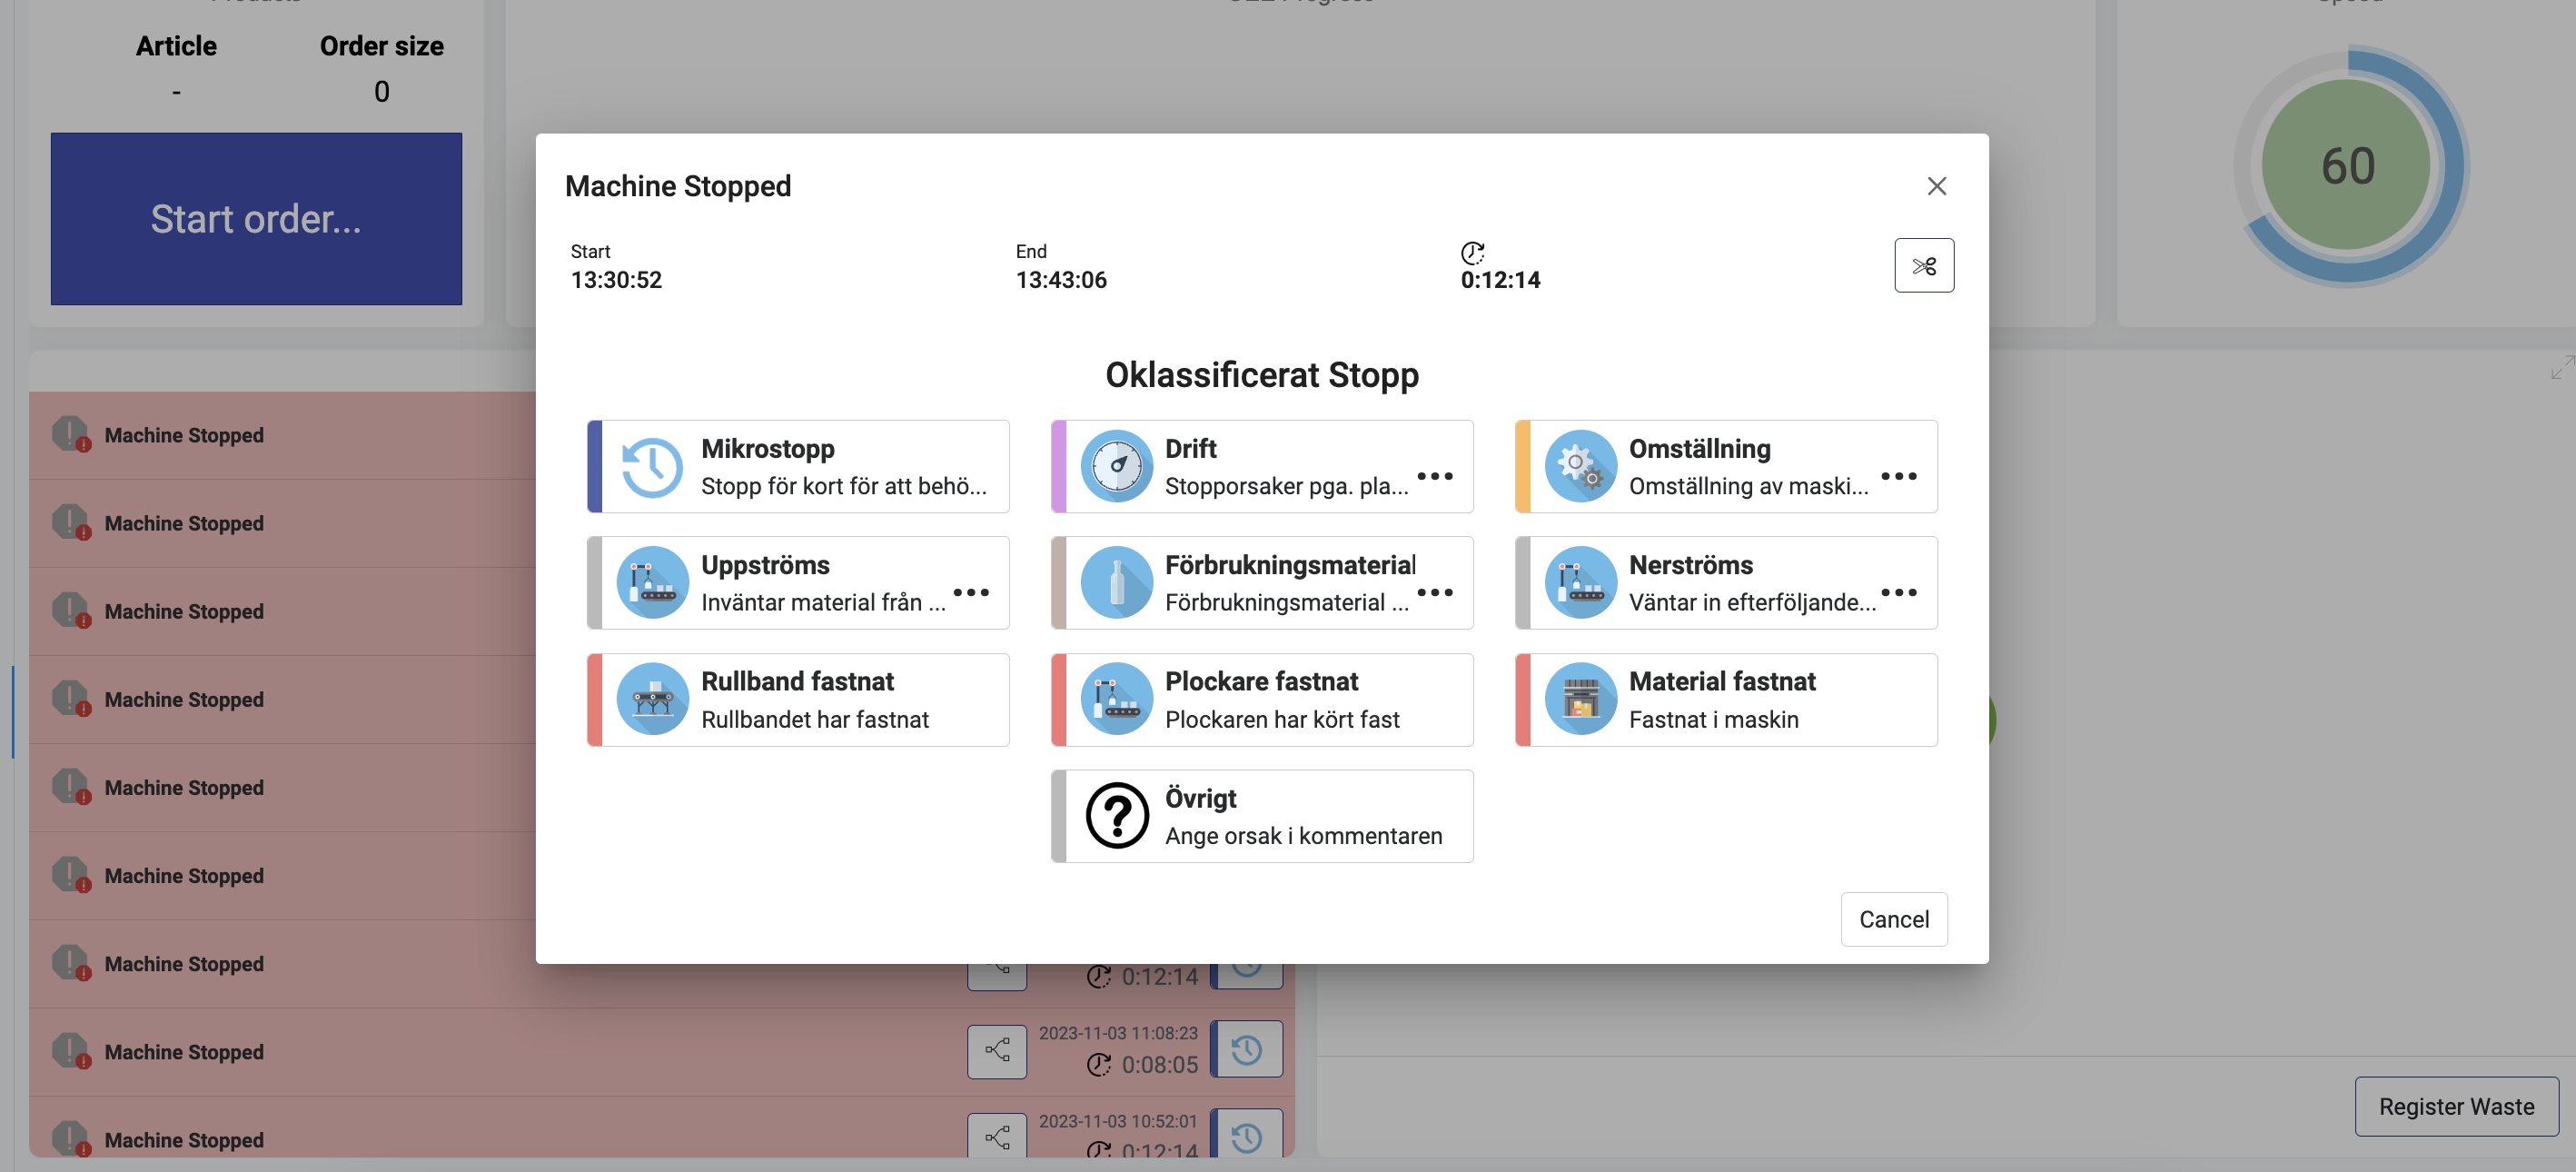
This dialogue displays all the codes. To classify the specific stop, click on a code. Note that the bricks with three dots represent subgroups with further codes.
Split stops
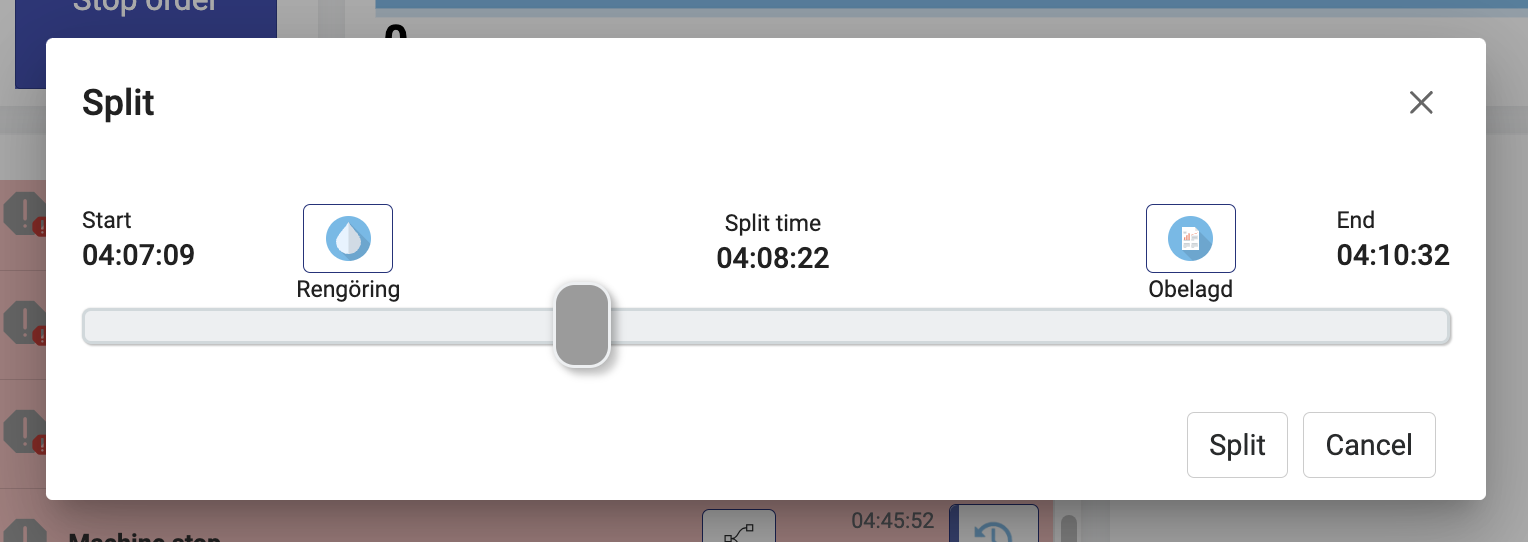
- Open the classification dialog for the stop that should be split.
- Click on the scissors icon.
- Classify each part of the split.
- Use the slicer to split the stop.
- Click the
Splitbutton
Change codes
The codes are managed in what we call the Loss tree, which is accessed through machine settings on the 'Loss tree' tab. Each code has its own node in a tree hierarchy.
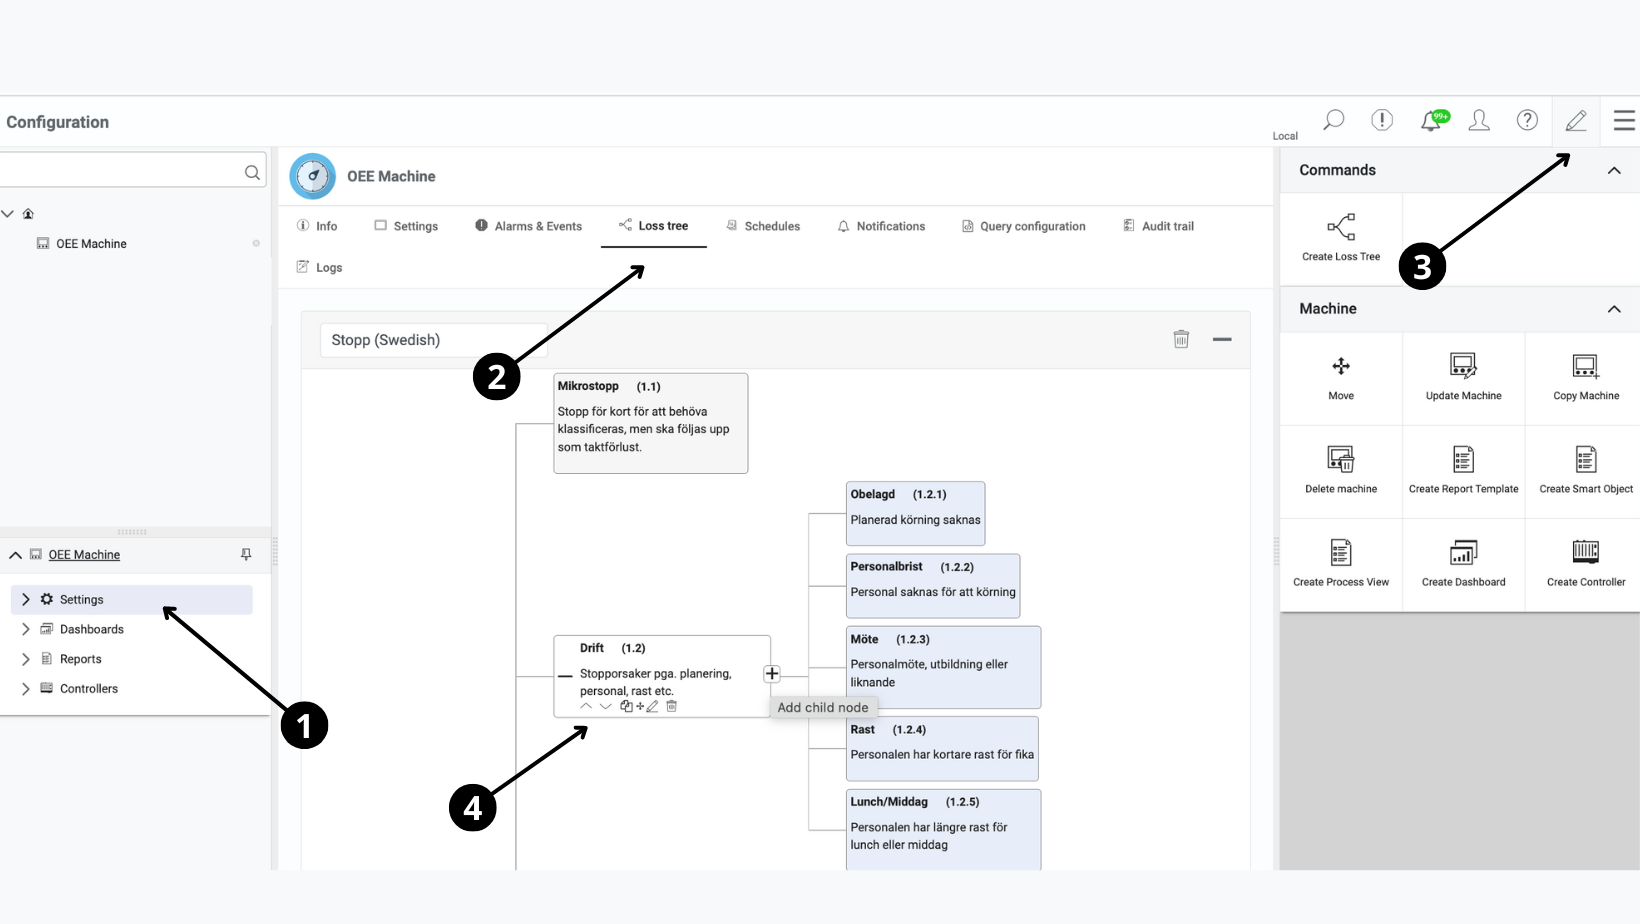
- Navigate to machine settings.
- Open the
Loss treetab. - Click the pen icon to enter editor mode.
- Hover over the node you want to edit, delete, or move, and choose the appropriate action.
When finished, remember to close the editor mode and send the configuration to the gateway. Note that removing a node will delete all classifications associated with that code.