Shift Configuration
In this guide we will walk you through how to use the Connectitude shift configuration tool to add, modify and plan out a schedule.
1. Creating a Schedule

In the shift configuration view, named Shifts & Breaks in this example, press the Create Schedule button [1.] and name it appropriately.
2. Adding Shifts
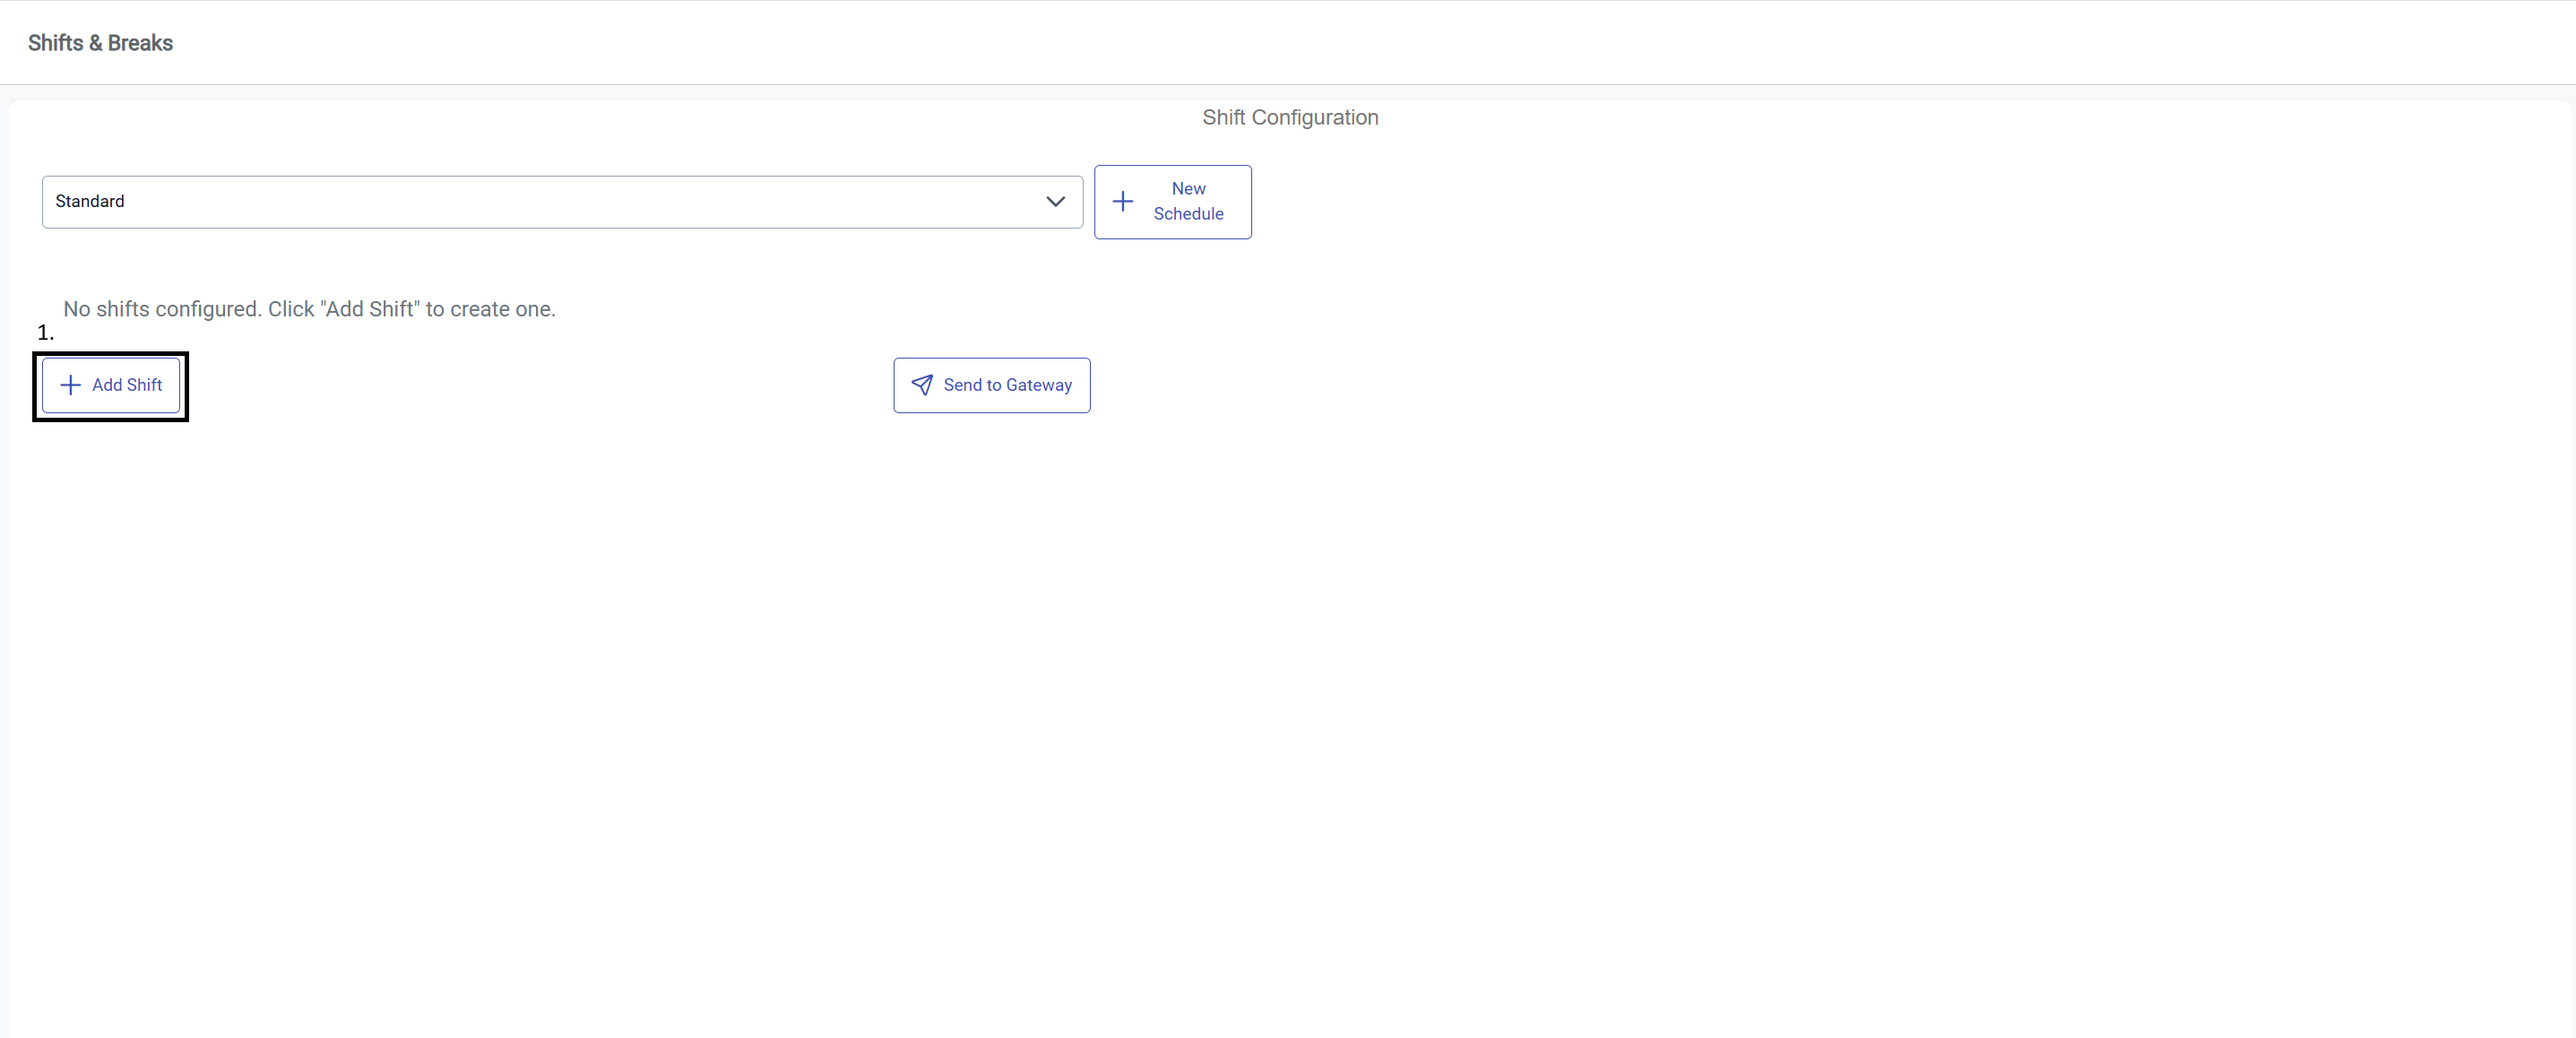
Press the Add shift button to add your first shift.
Here the details of the shift can be configured. It includes name, number, start/end time, weekdays, frequency and start date.
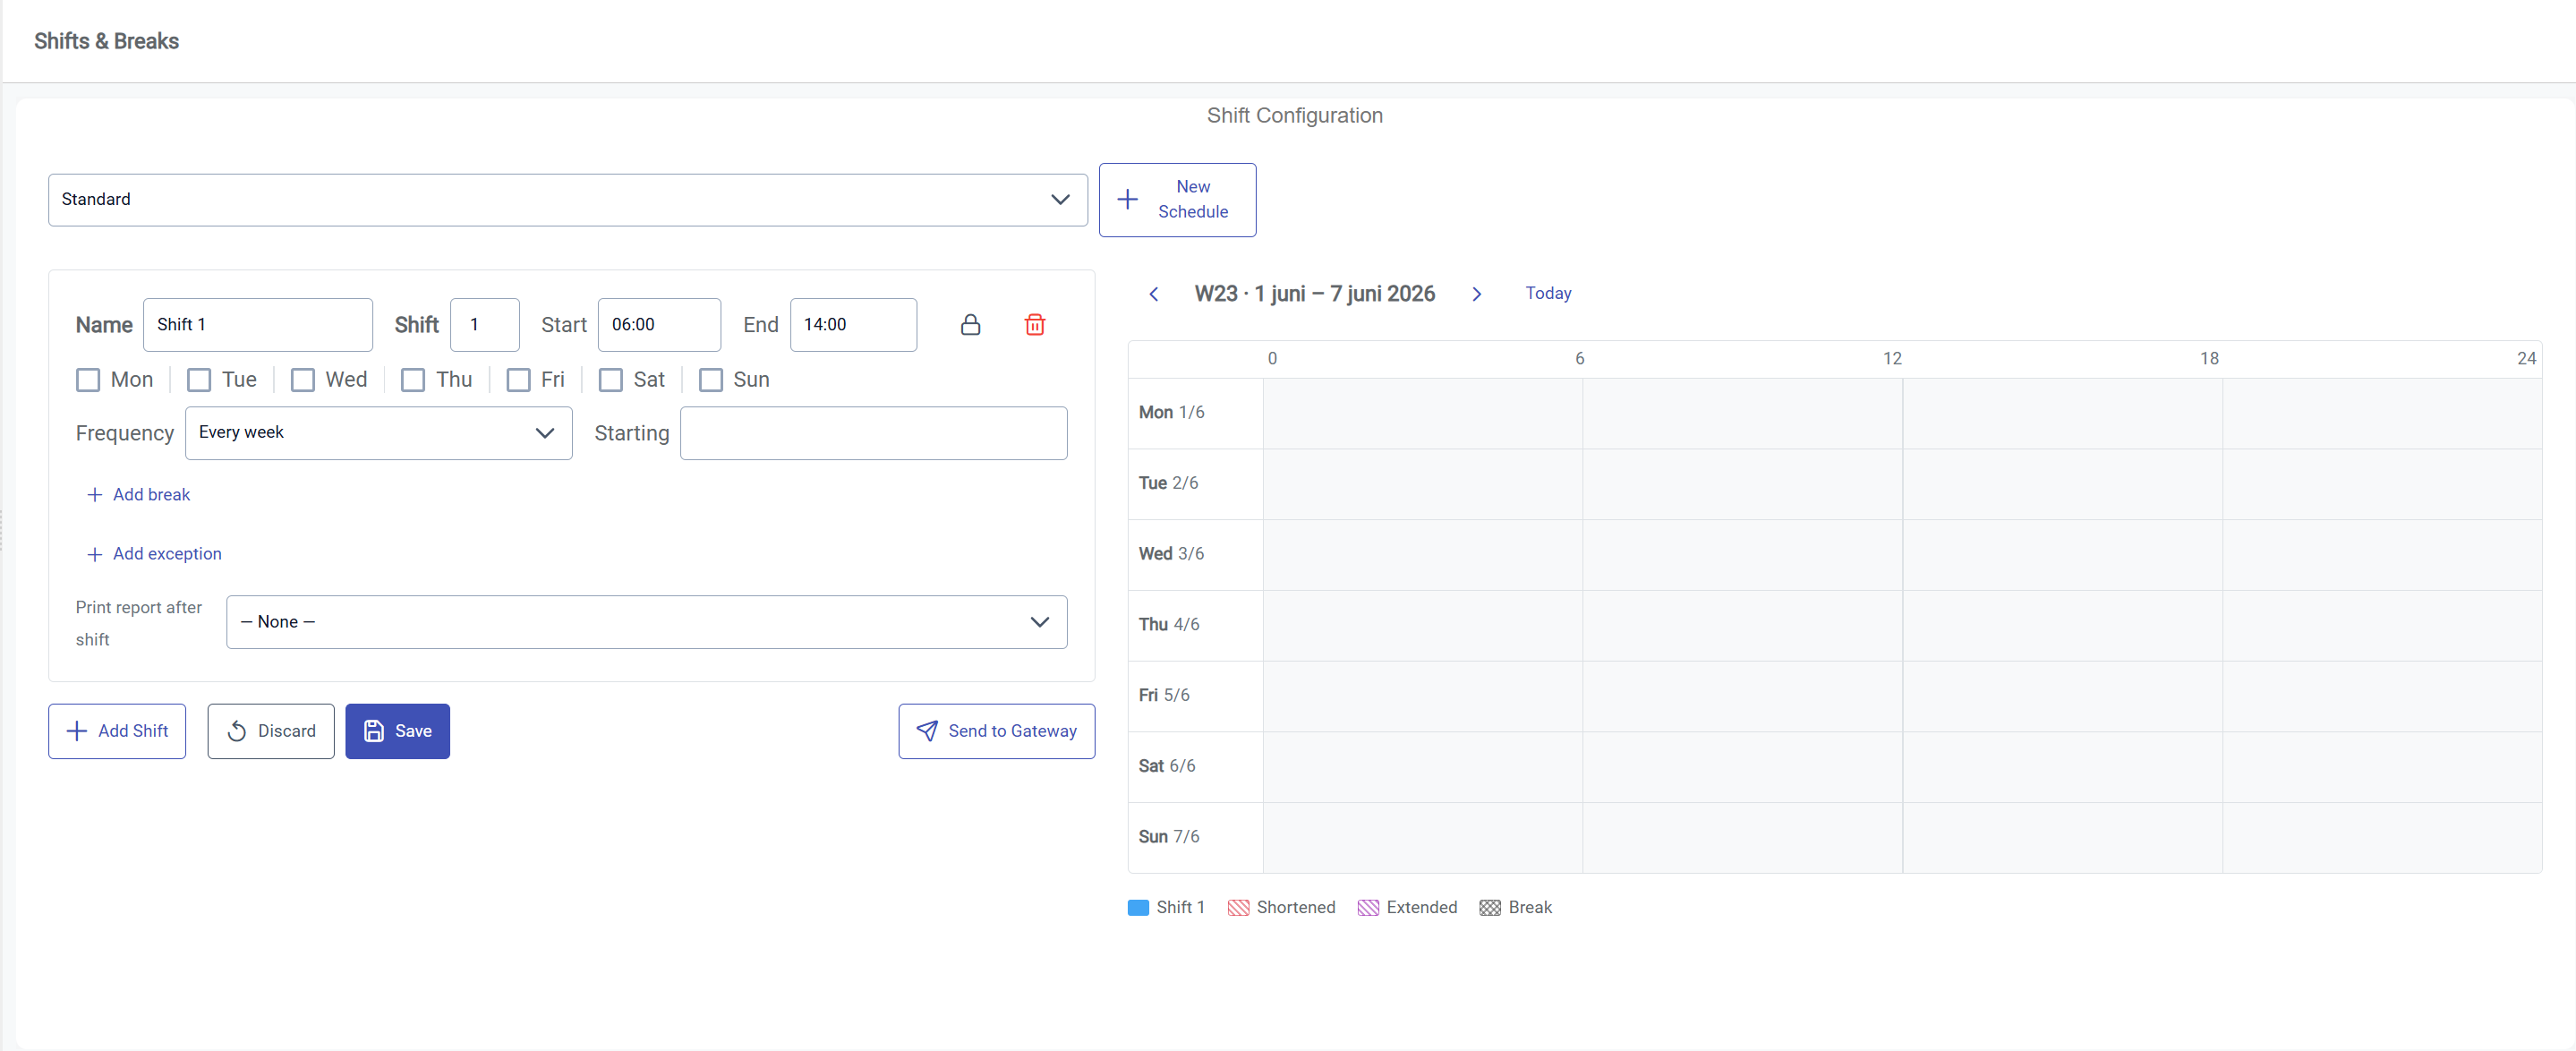
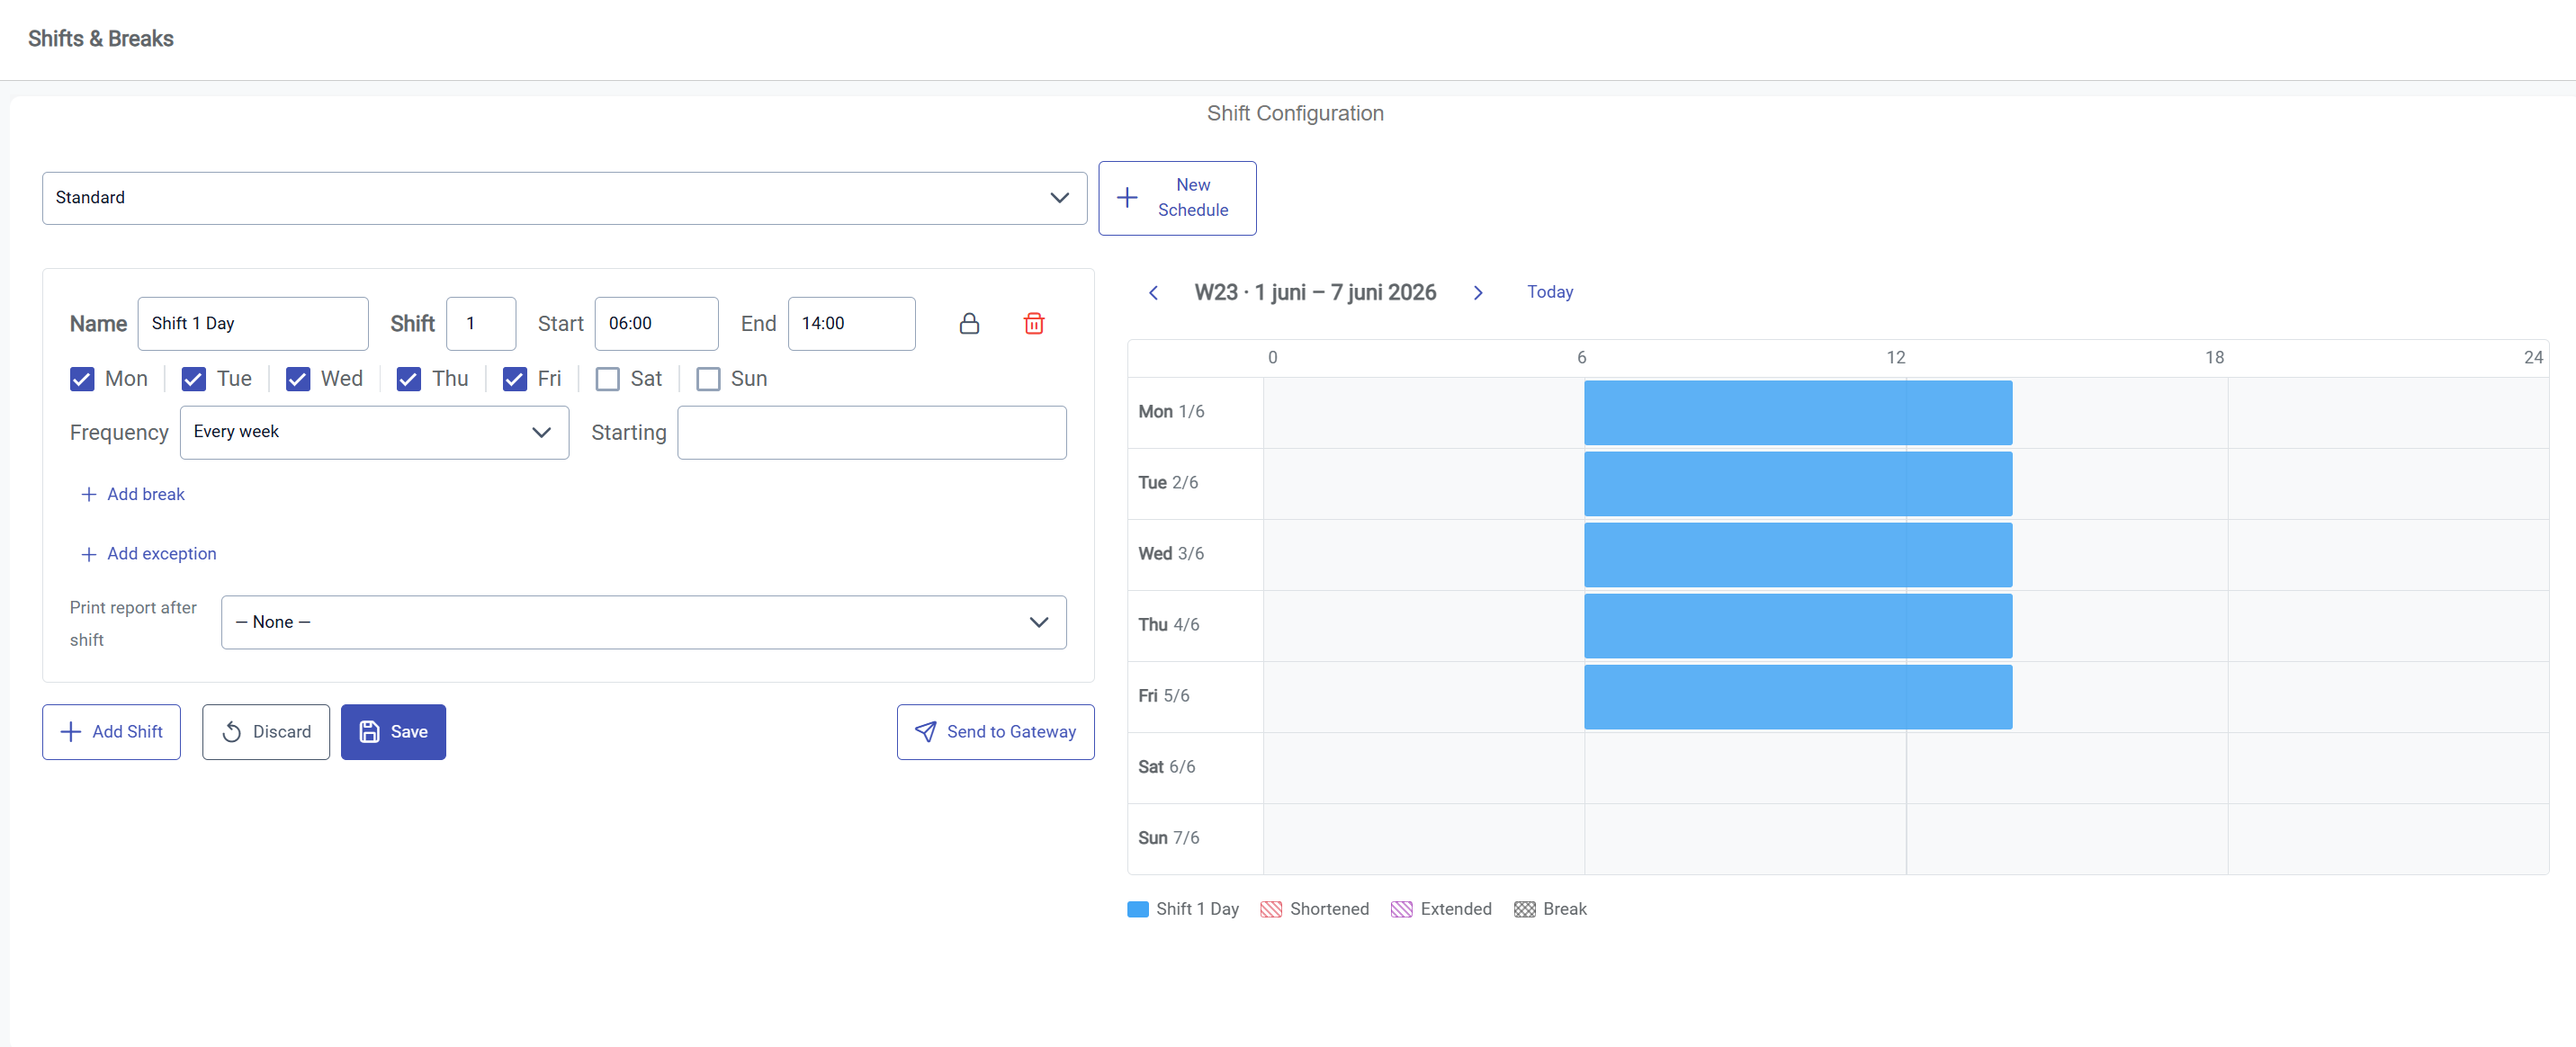
In this example a day shift was added for every weekday, every week. For now the frequency and start date will be left as is, but will be changed when adding a second set of biweekly shifts (see section 5.)
IMPORTANT: Always remember to press Save in order to keep the changes made to the schedule.
3. Adding Breaks
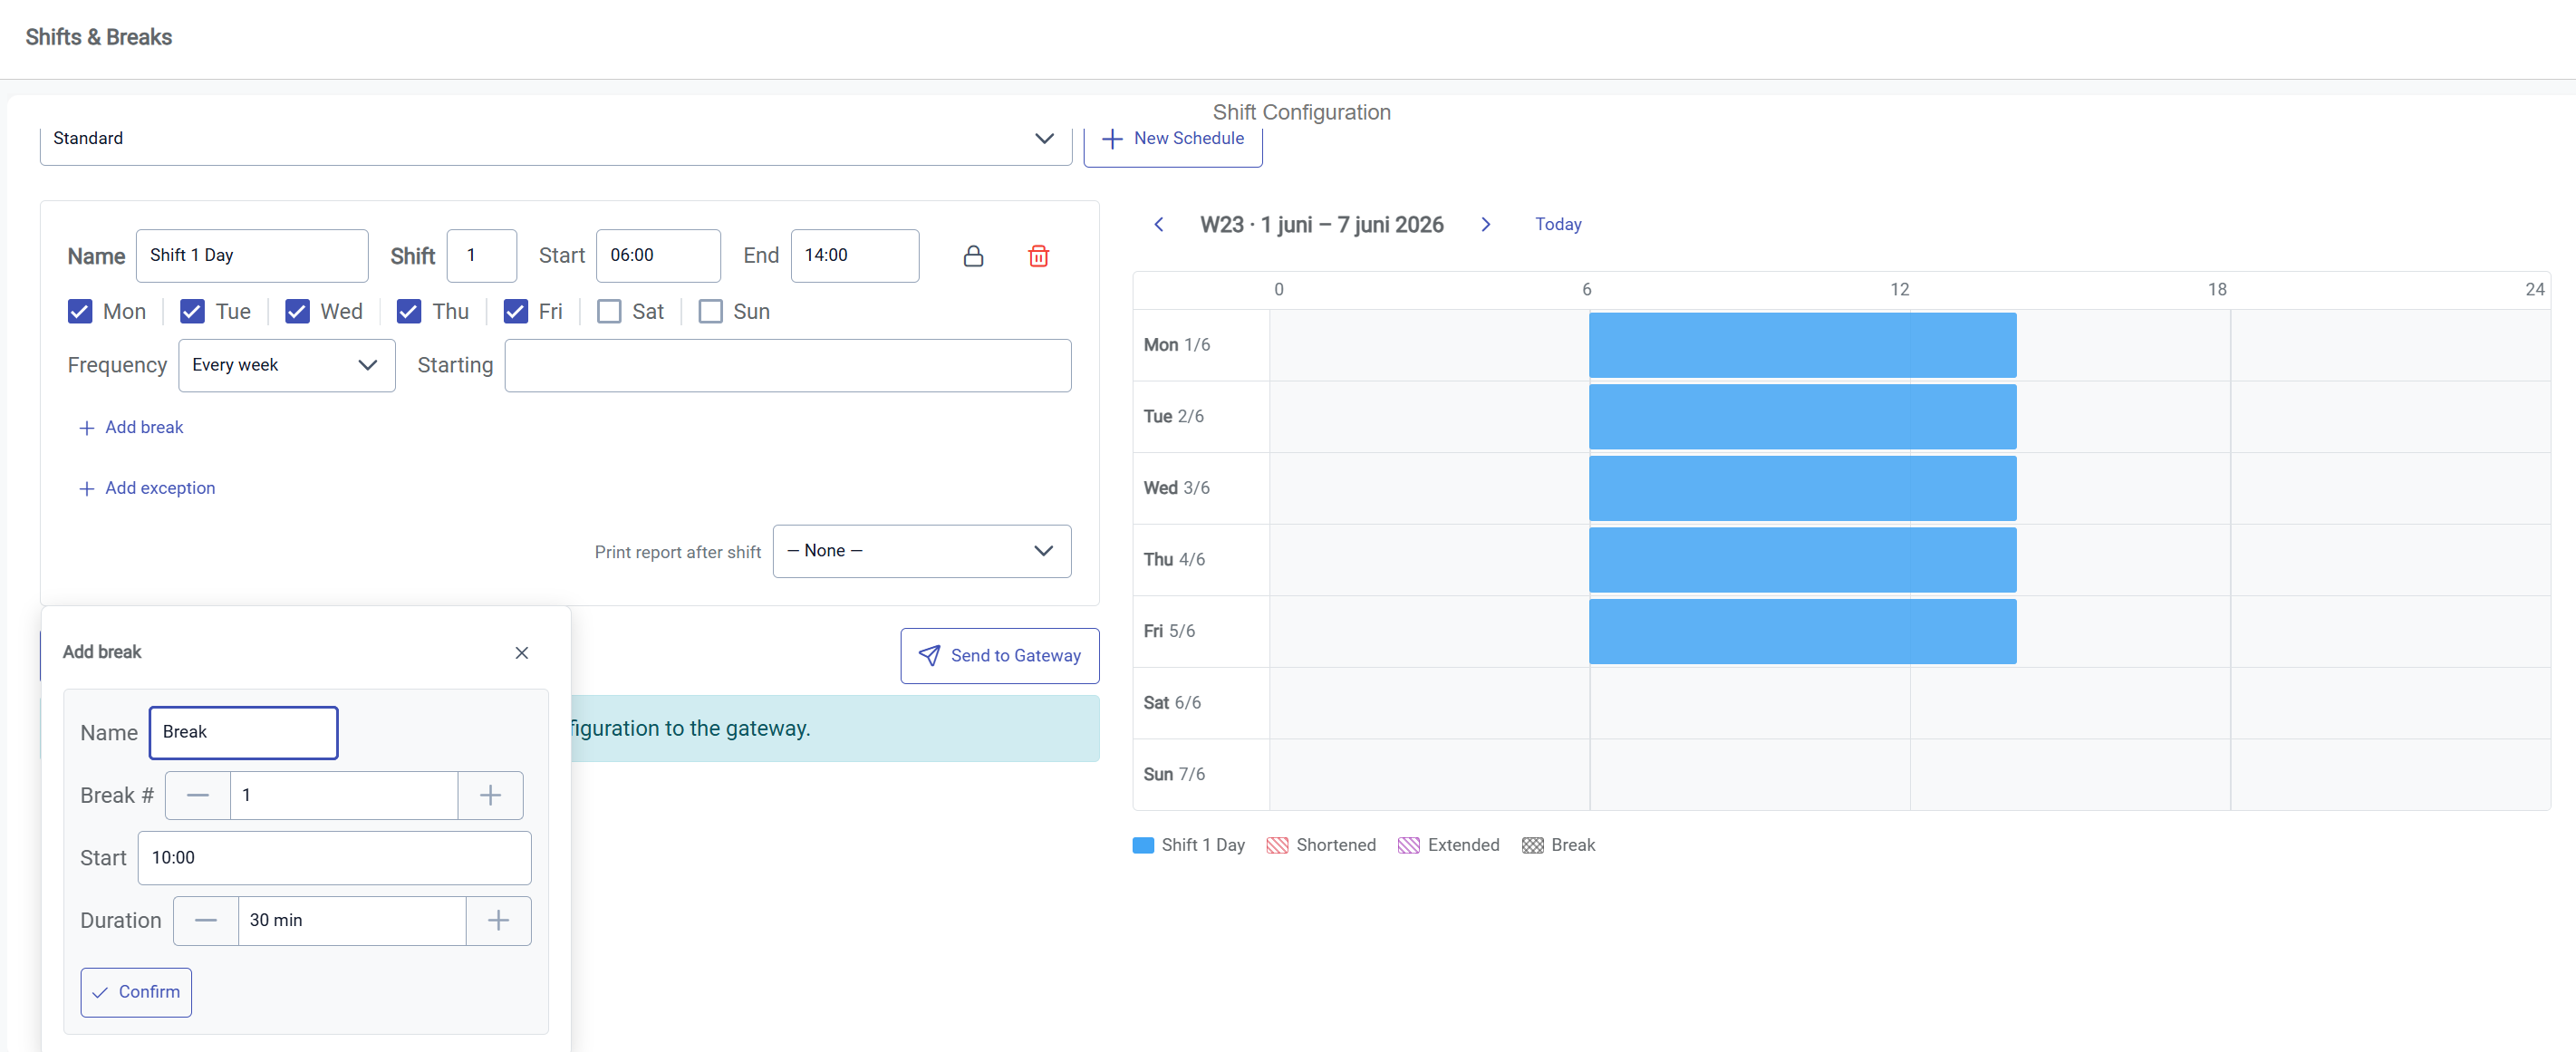
Press the Add break button to open the break modal. In it you will get to choose a name, break number, start time and duration. Remember to increment the break number by 1 for each break you add, in order to be able to differentiate them later in analysis.
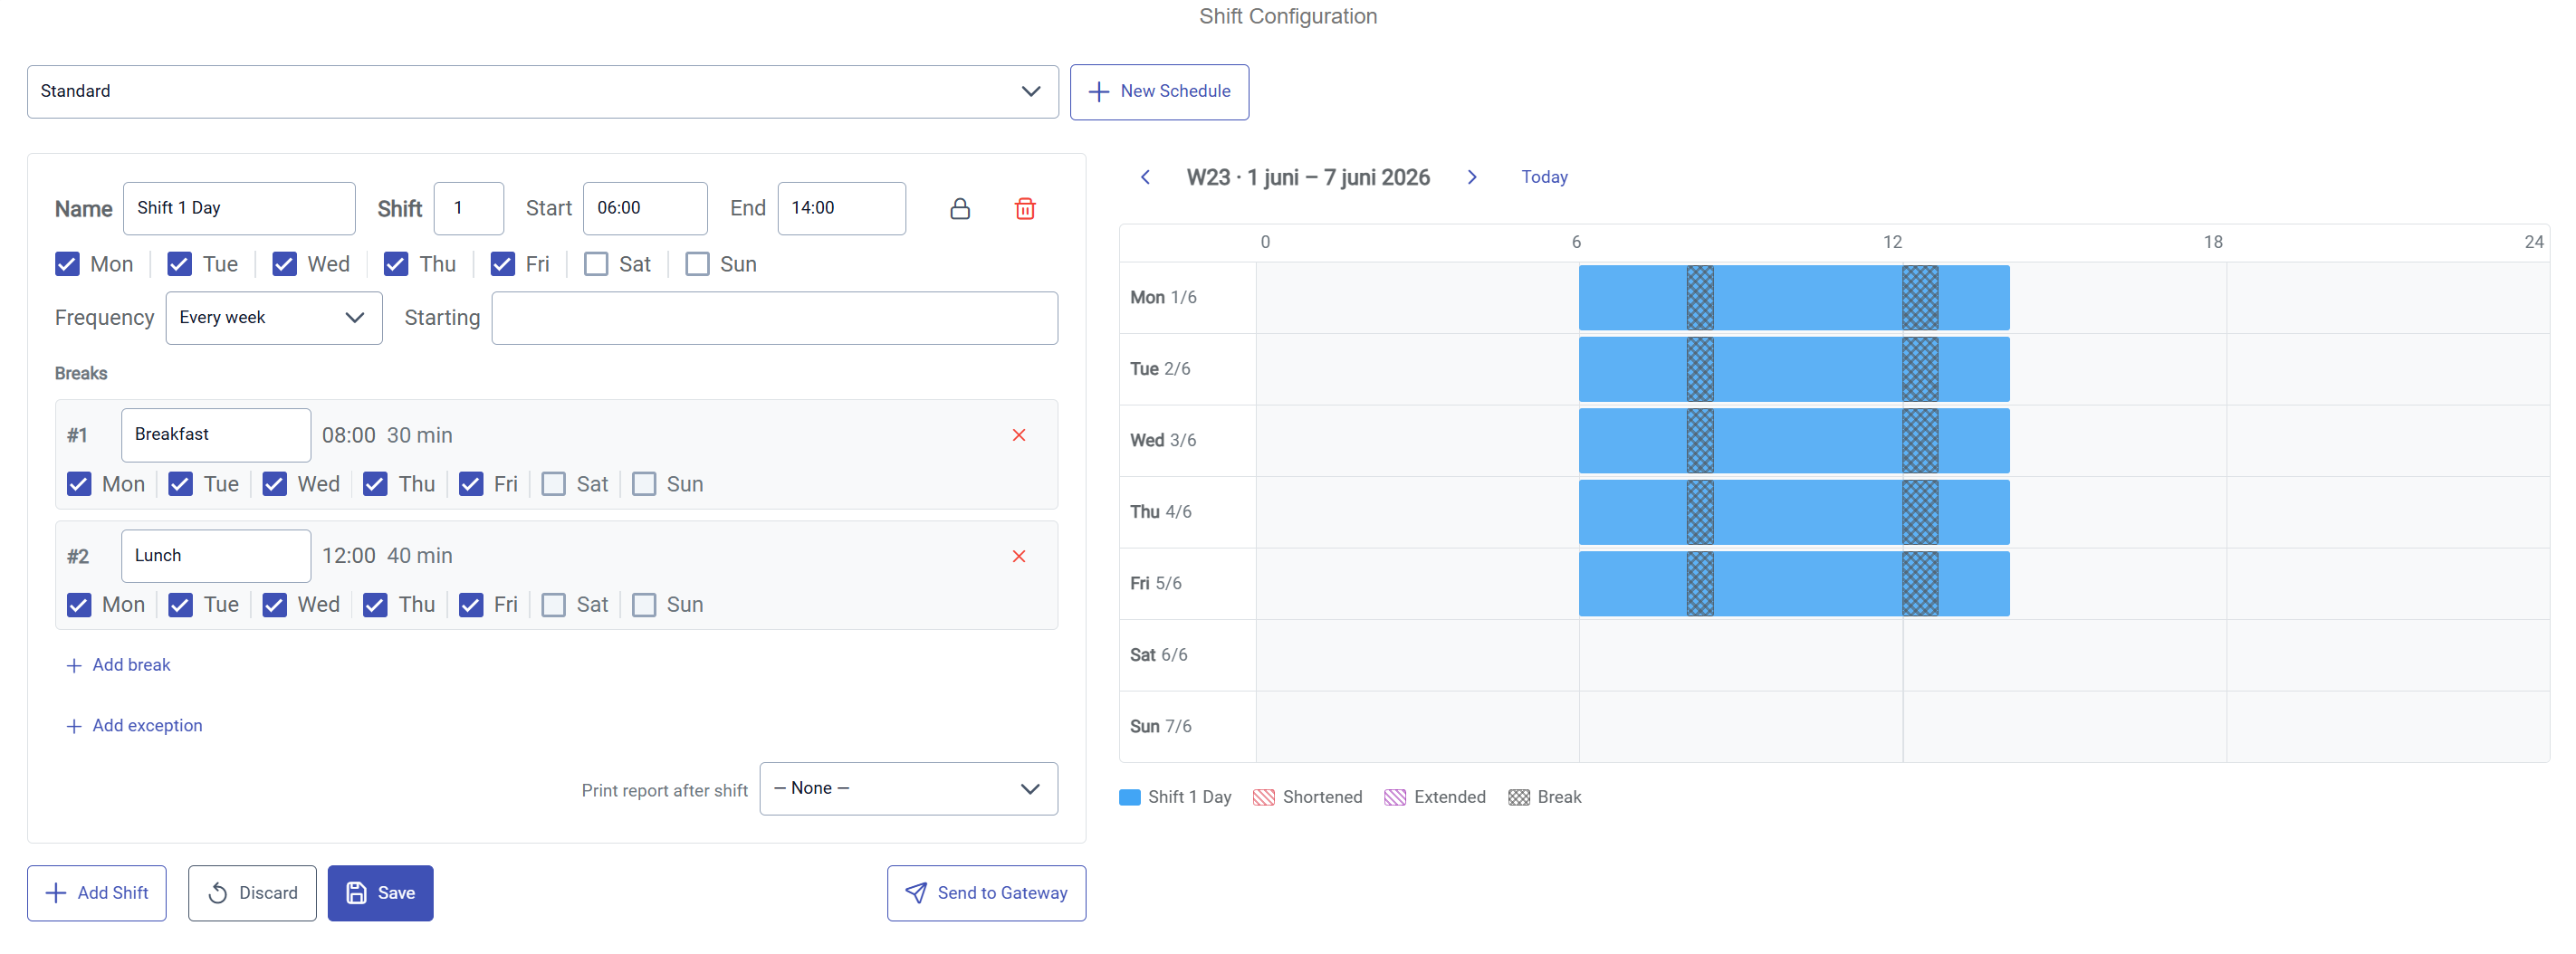
In the example two breaks were added; Breakfast and Lunch. They were respectively set to numbers 1 and 2, at appropriate times with an appropriate duration. The breaks can be seen as visualized by the criss-cross patterns over the shift schedule bars.
Remember to press Save.
4. Adding more shifts
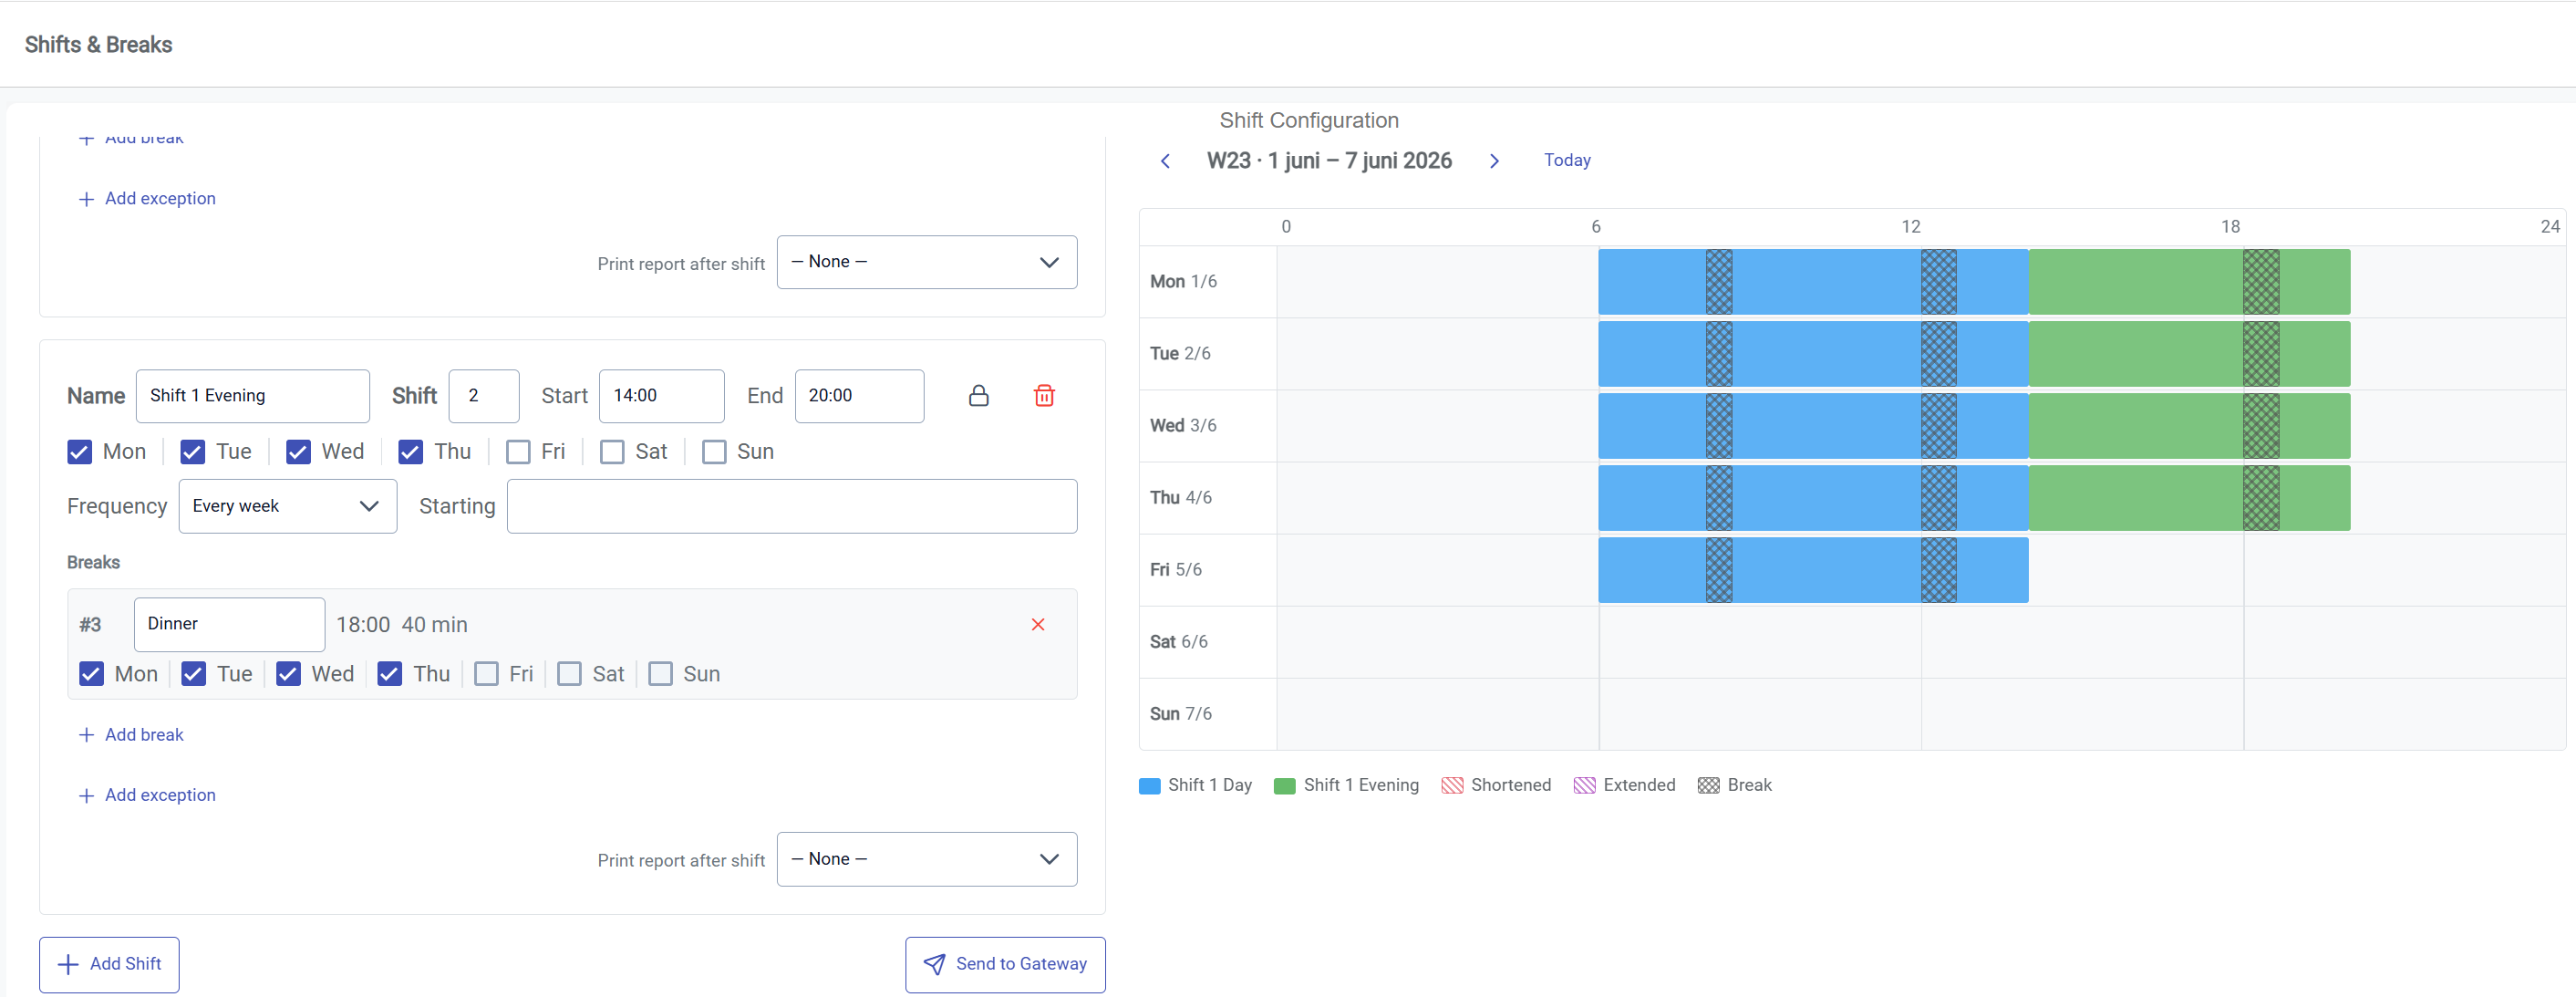
The process is repeated for adding more shifts and breaks. This time an evening shift was added, with a new shift number and further breaks. In this scenario the staff get off early on Fridays, so Friday is not selected to be active for the evening shift.
5. Weekly variation
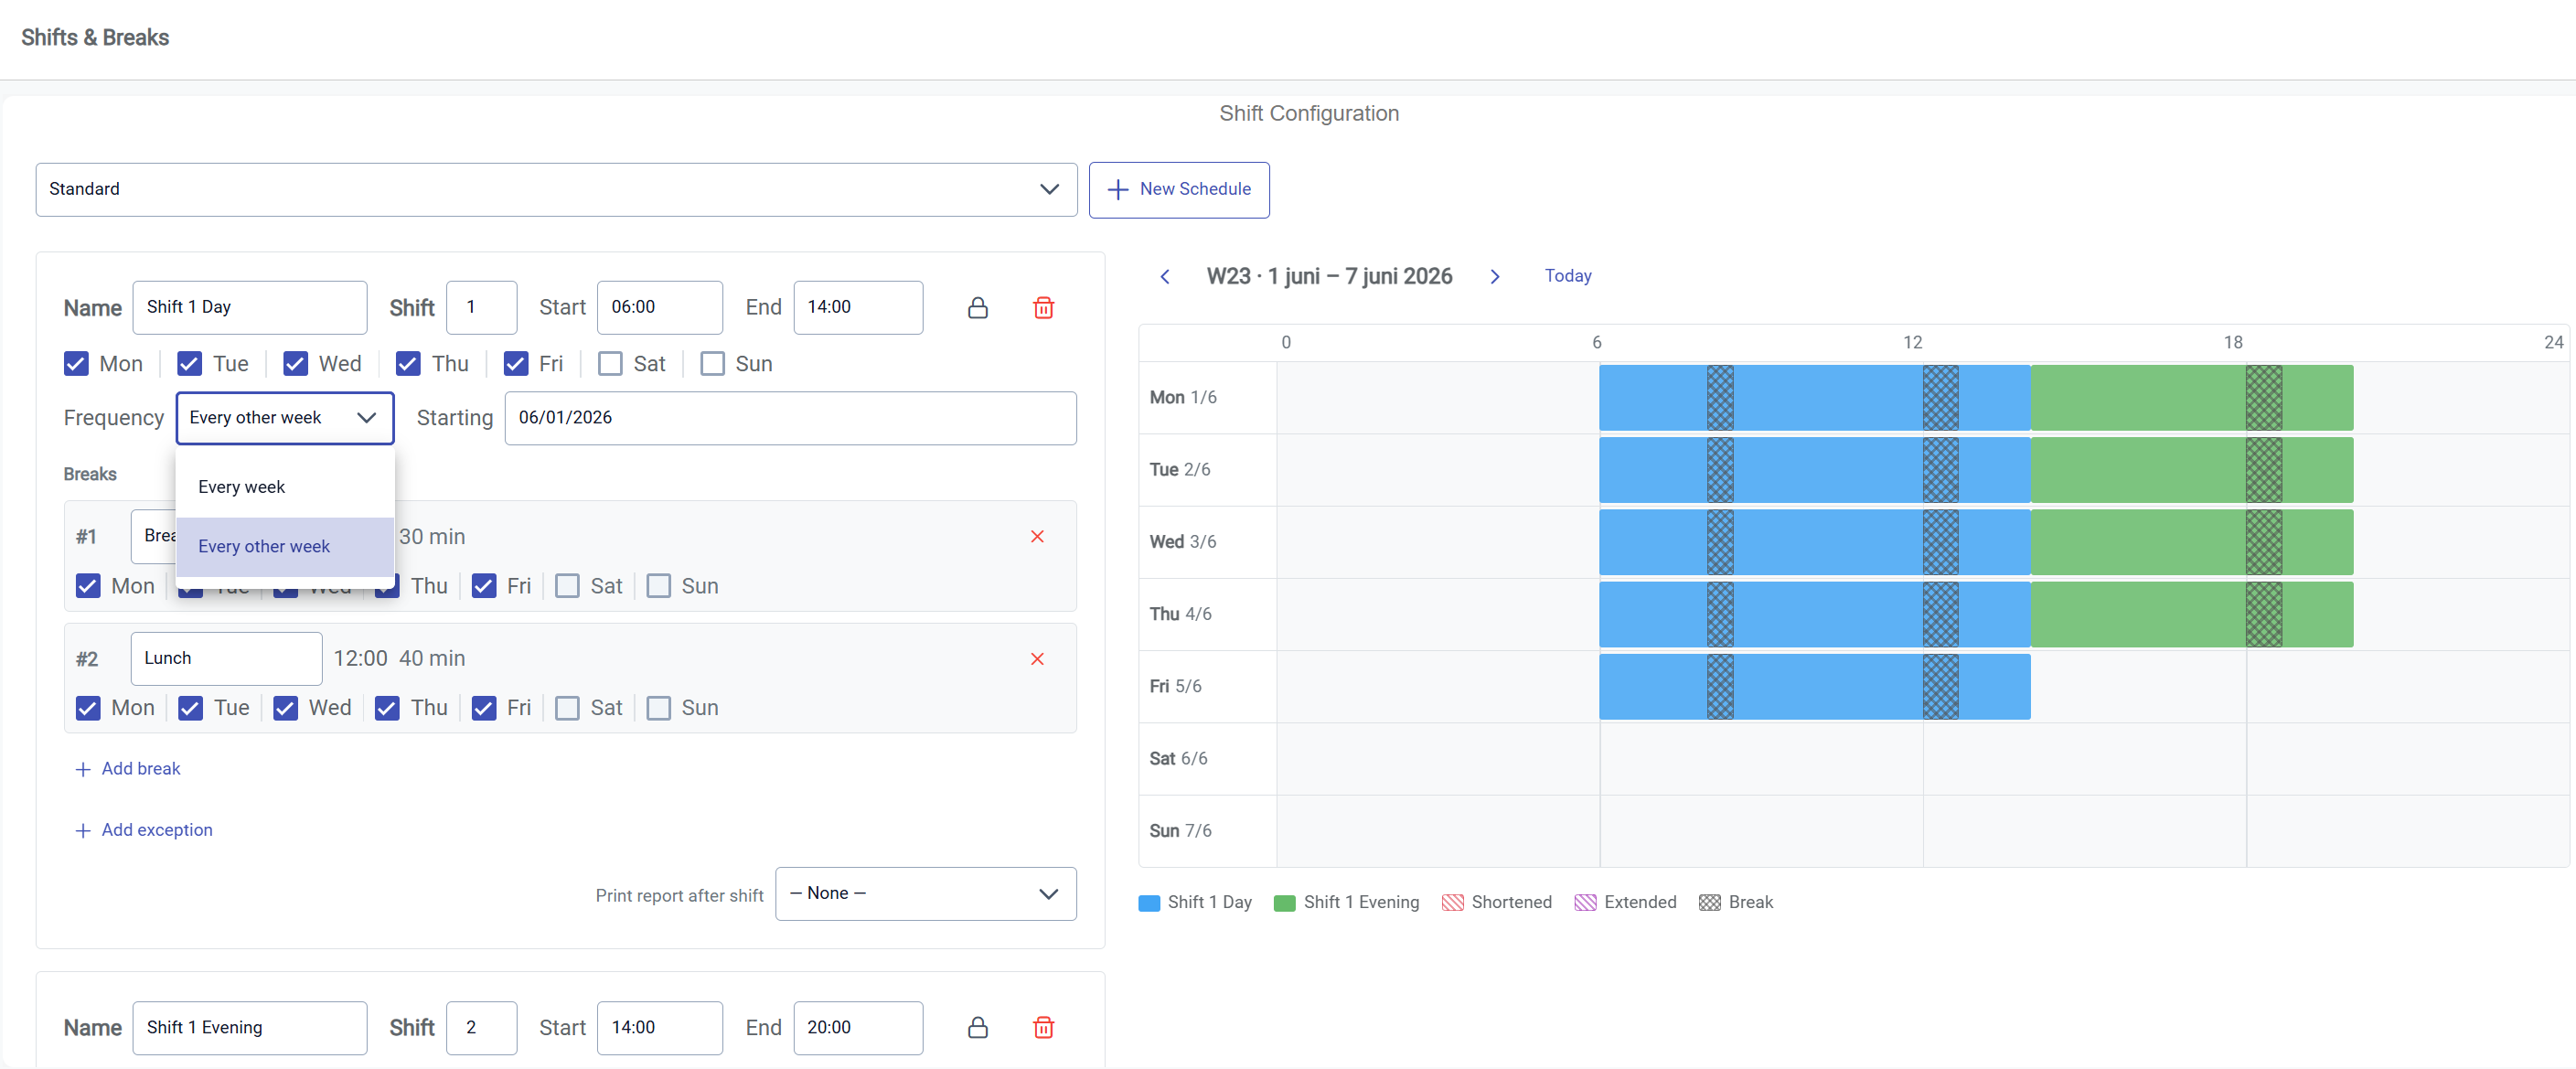
Shifts can be configured to be biweekly as well. This is done by selecting Every other week in the Frequency dropdown. This automatically sets a start date for the shift-week, determining which shifts fall on which weeks.
Note: This is done to Shift 1 Evening as well as they belong on the same shift-week.
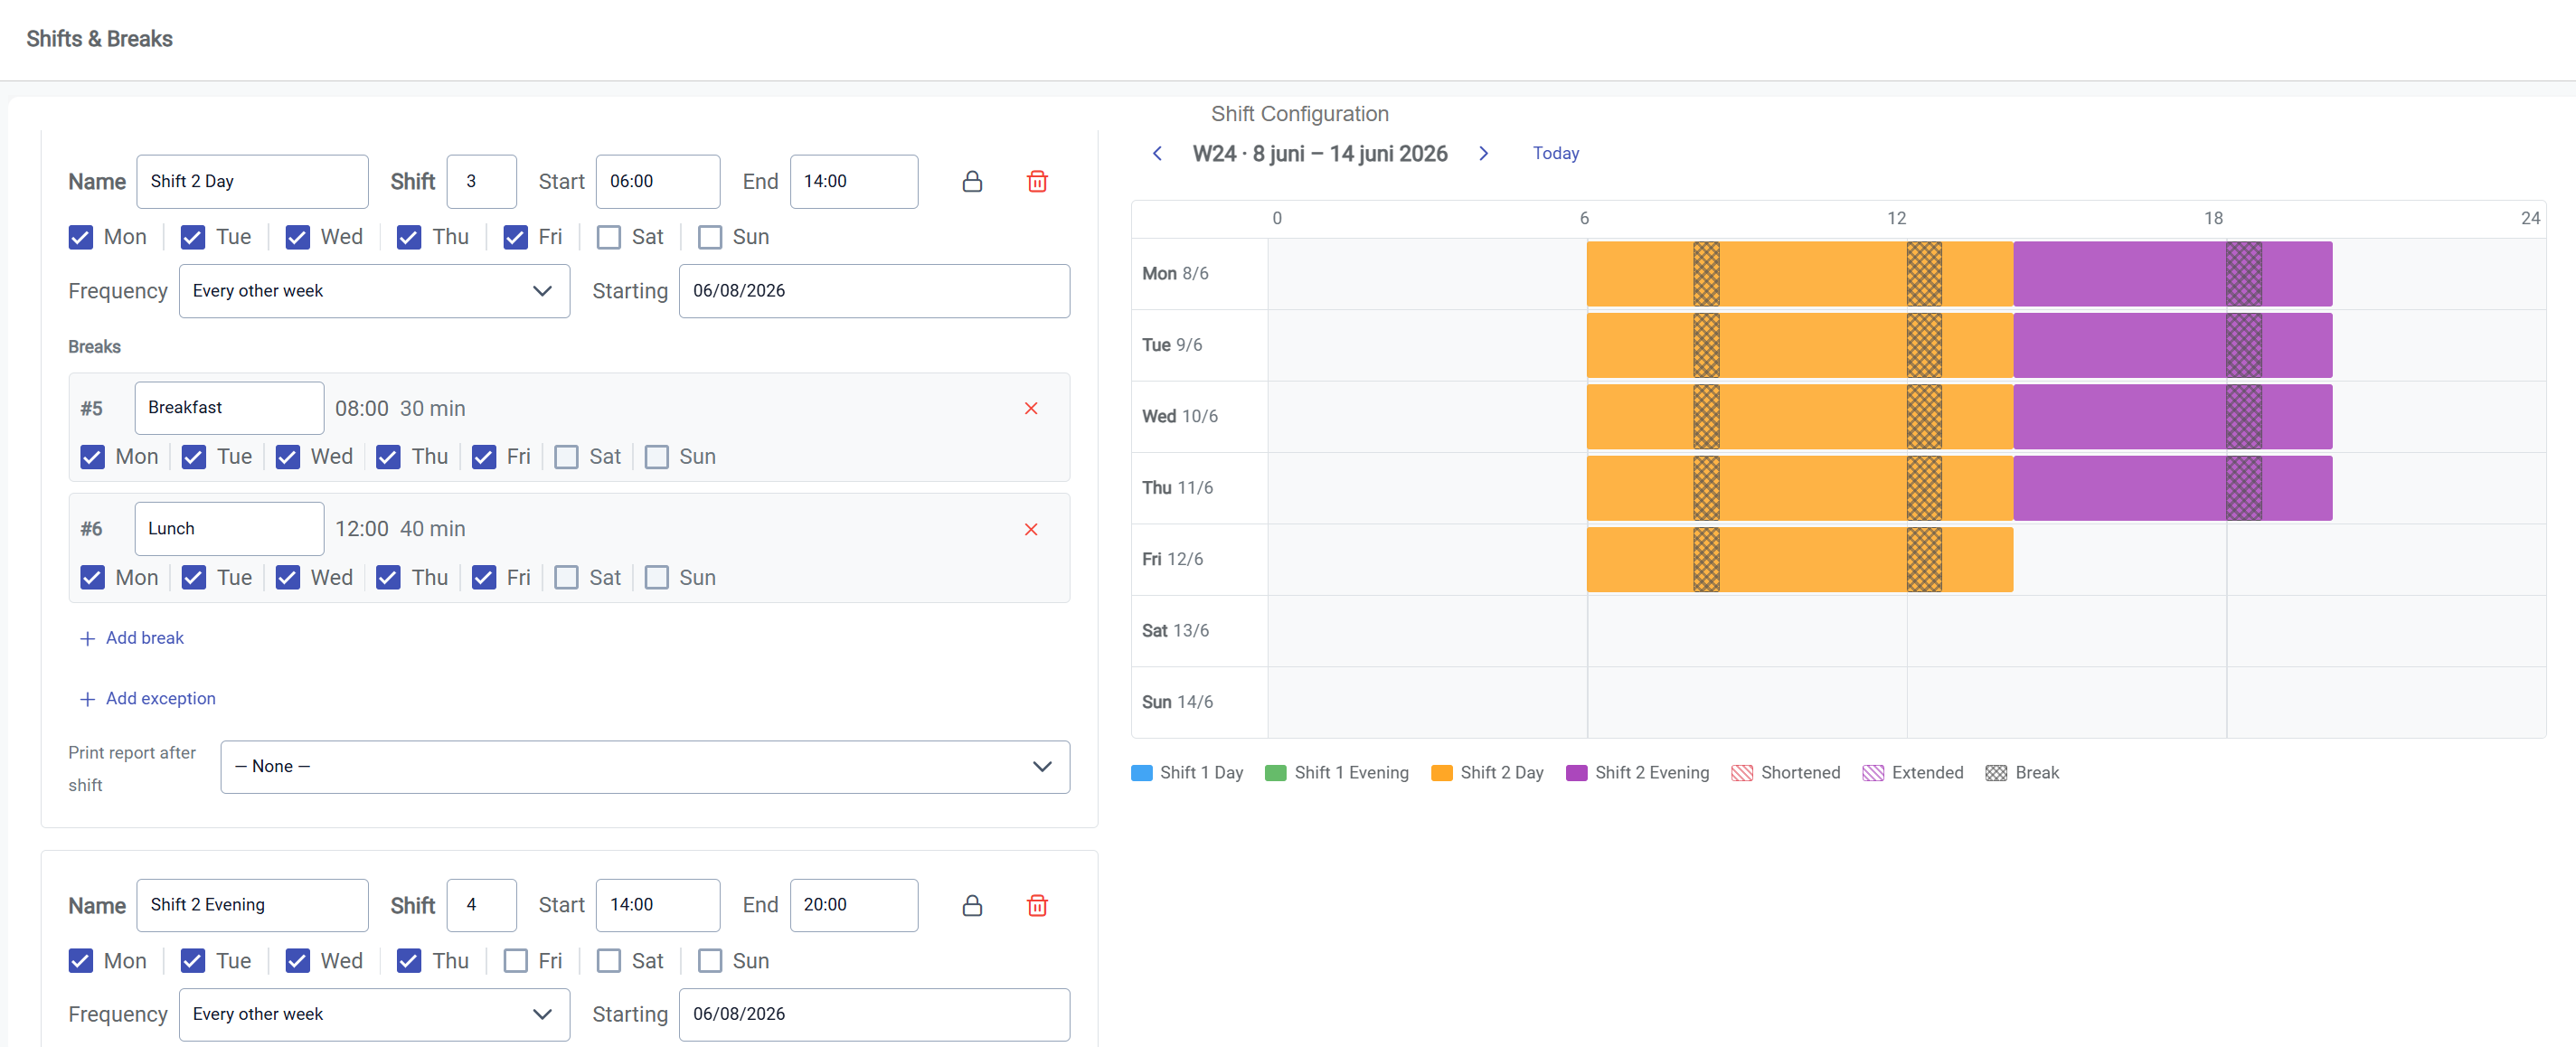
A second week of shifts can then be added by following steps 1-4, but setting the starting date to the week before or after the first set of shifts (in this case, week 24, since the previous shifts started on week 23). The new shifts are displayed in orange and purple in the image above.
6. Adding exceptions
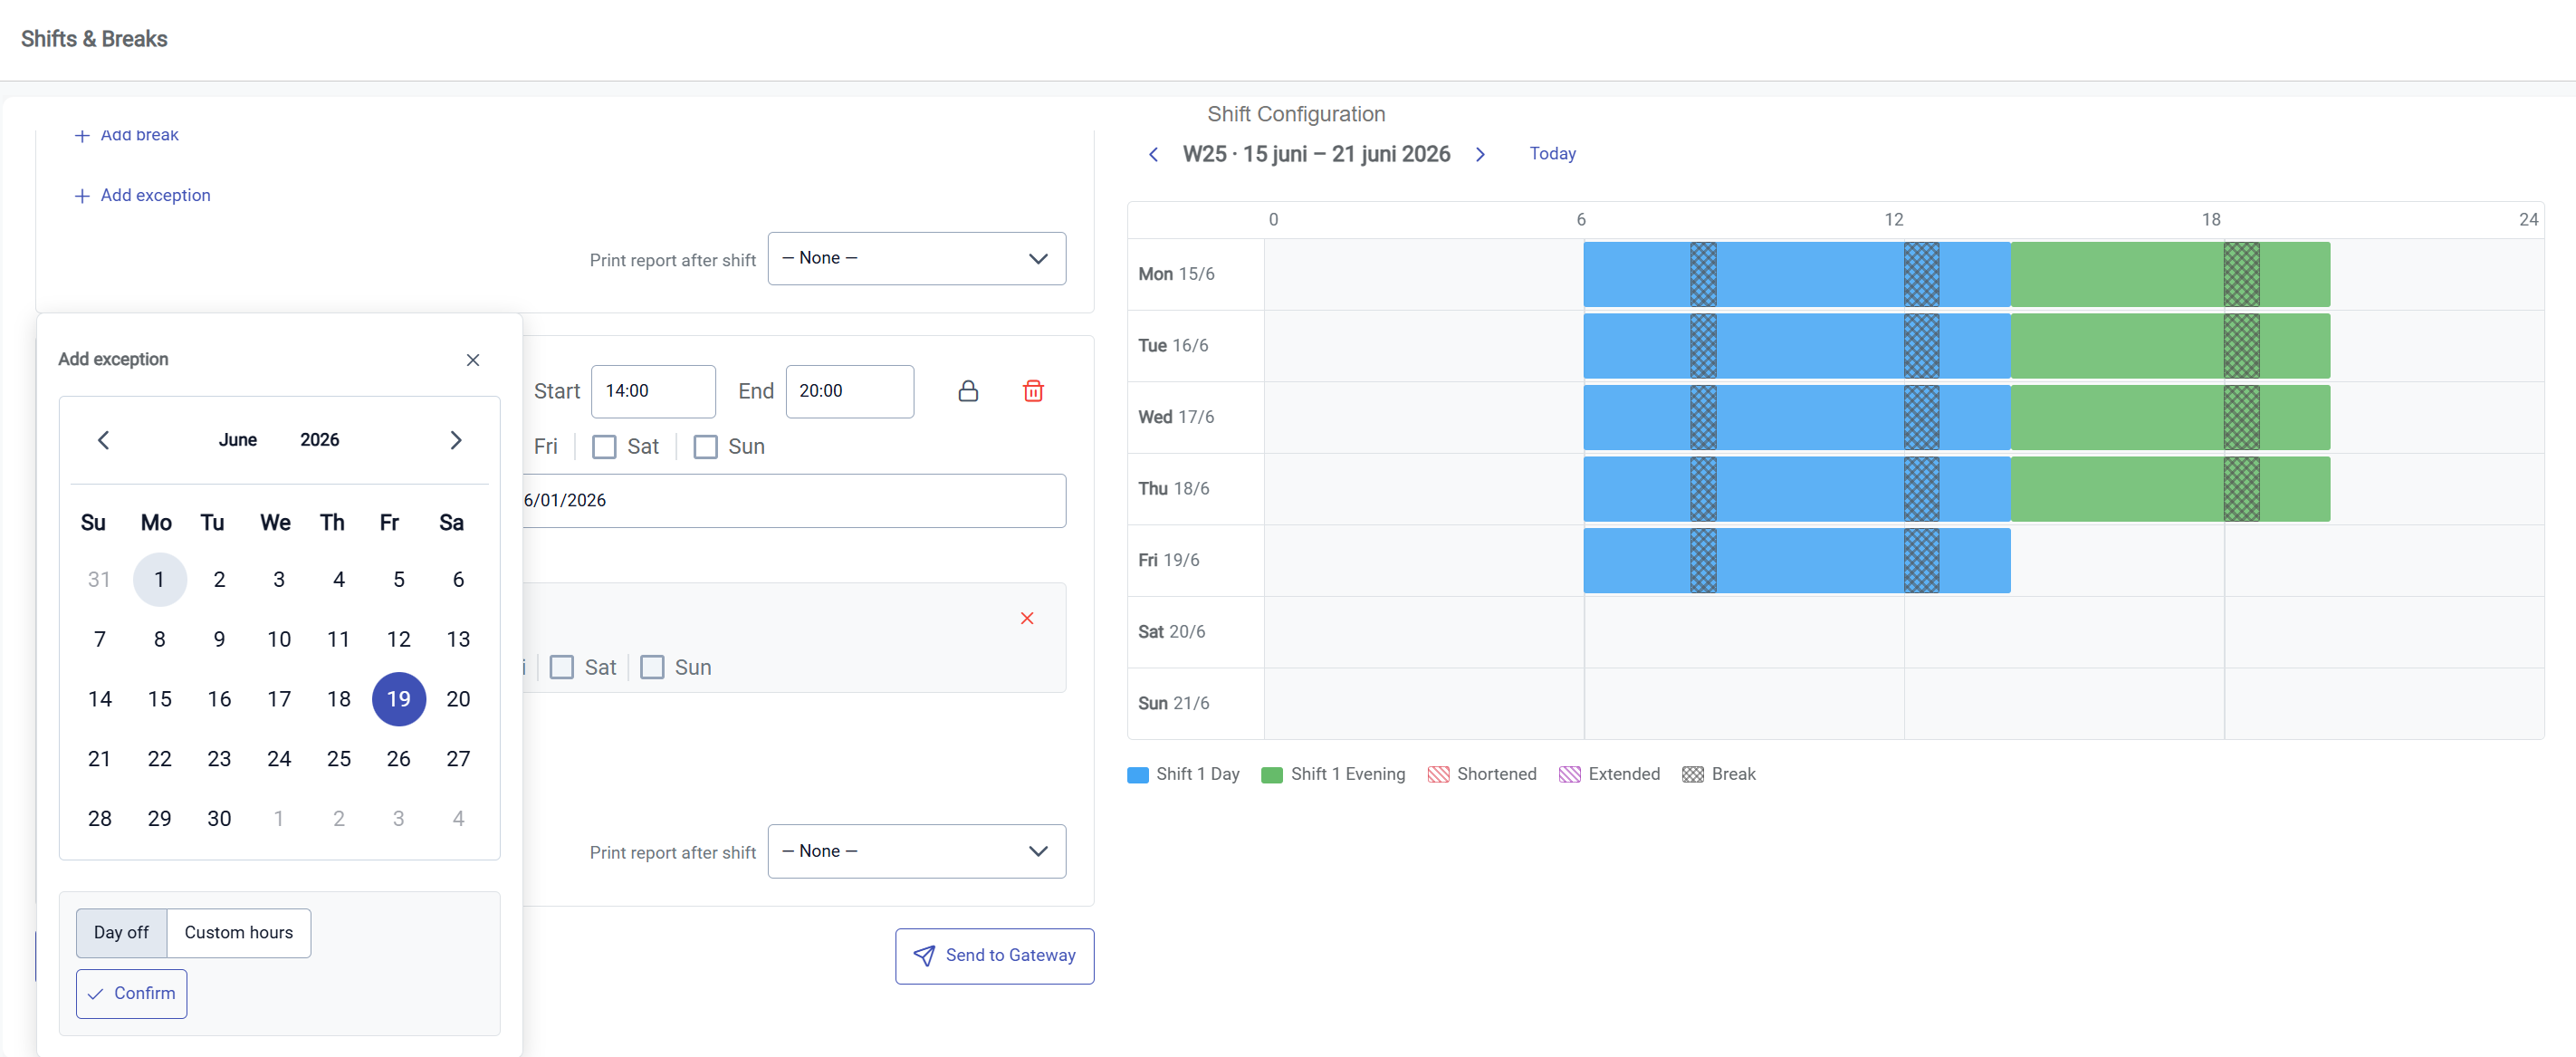
The Shift Configuration Tool allows for individual exceptions in the schedule. They can be added by pressing Add exception, choosing a date, whether the exception lasts for a few hours or the whole day, and pressing confirm.
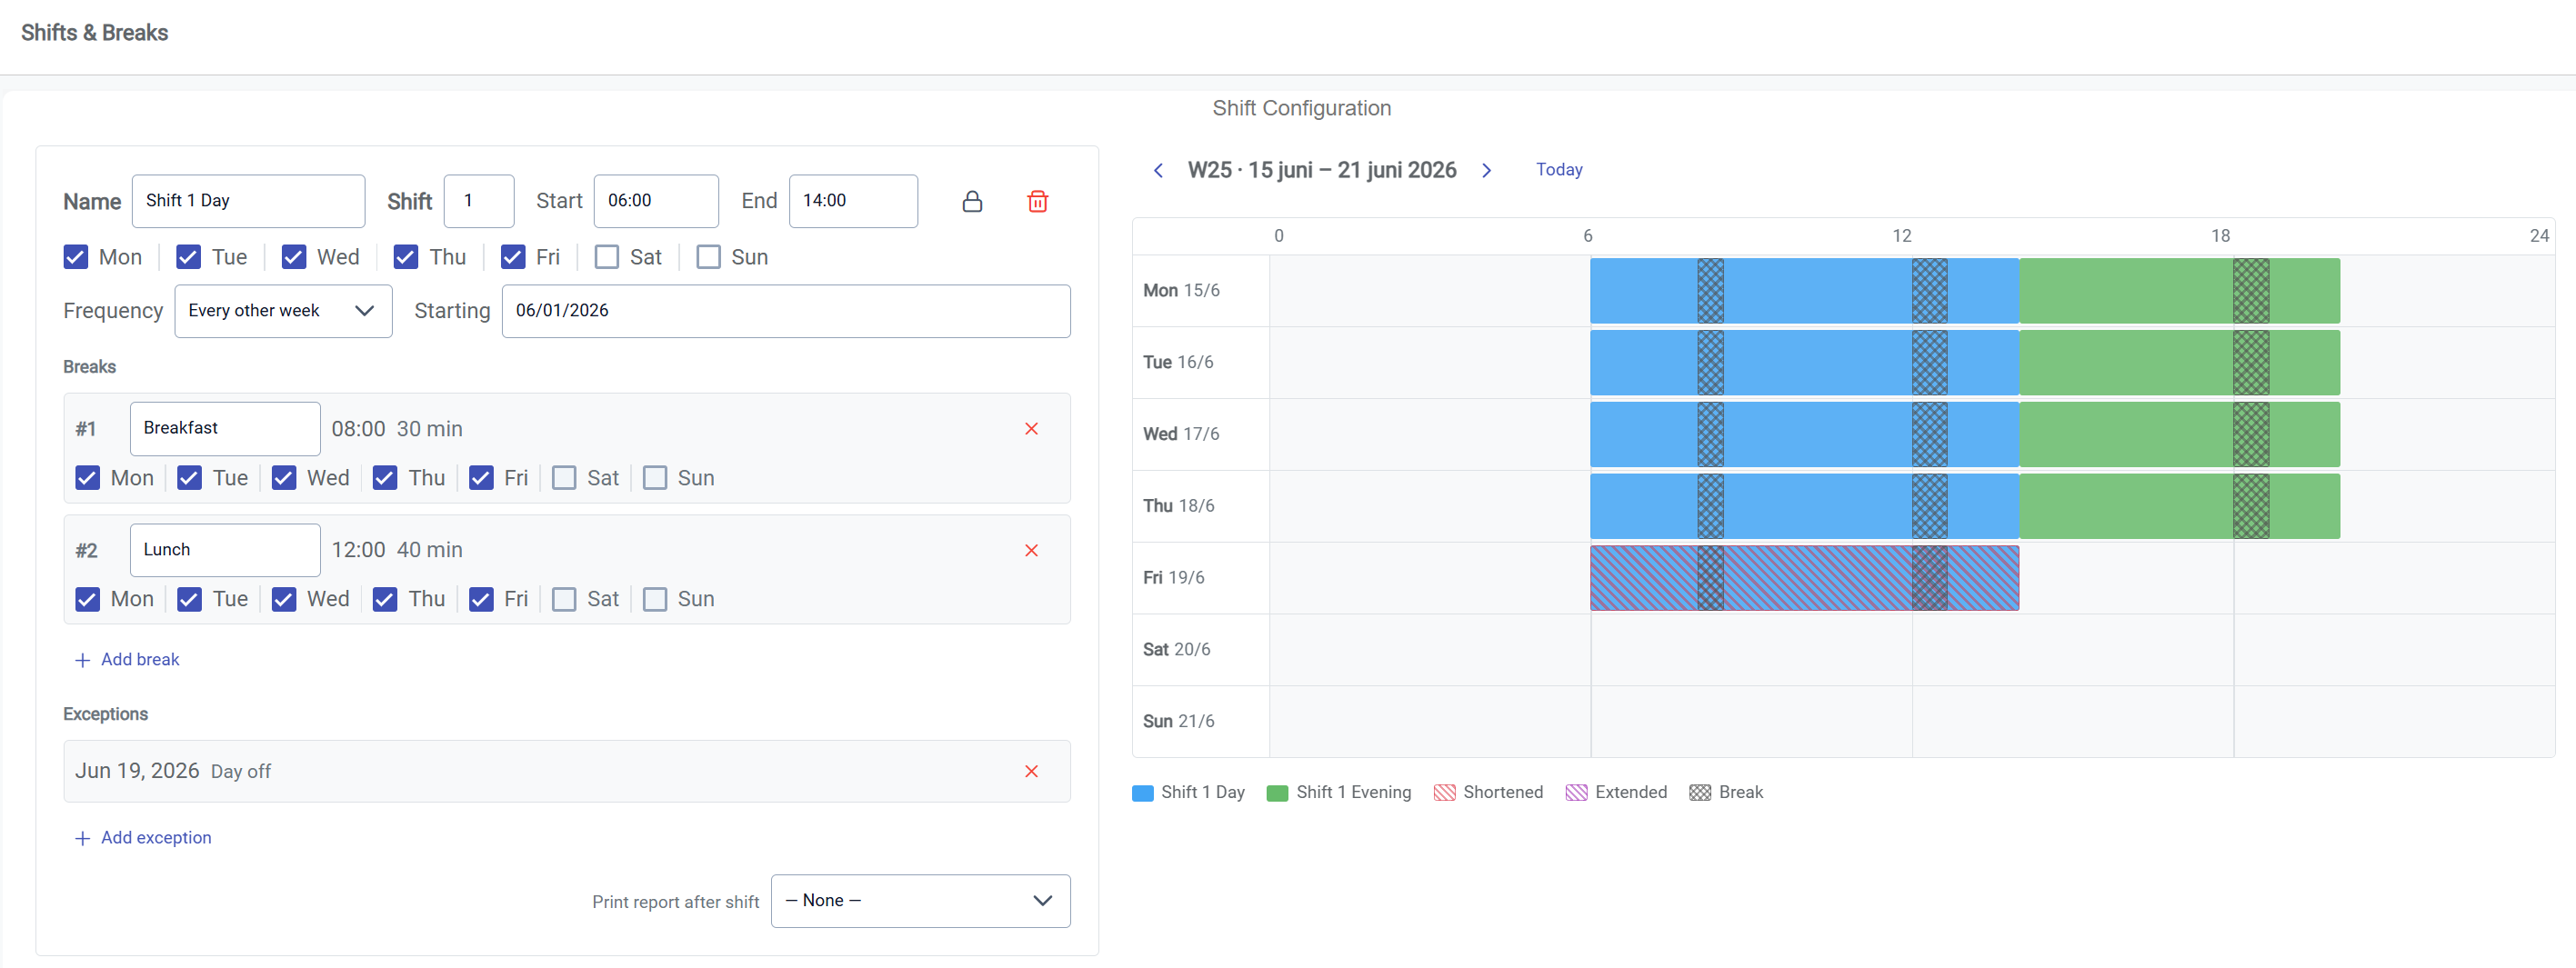
The day of midsummer, which fell on June 19th, 2026, the staff were scheduled to take the whole day off. This can be seen by the red striped pattern over the Friday day shift.
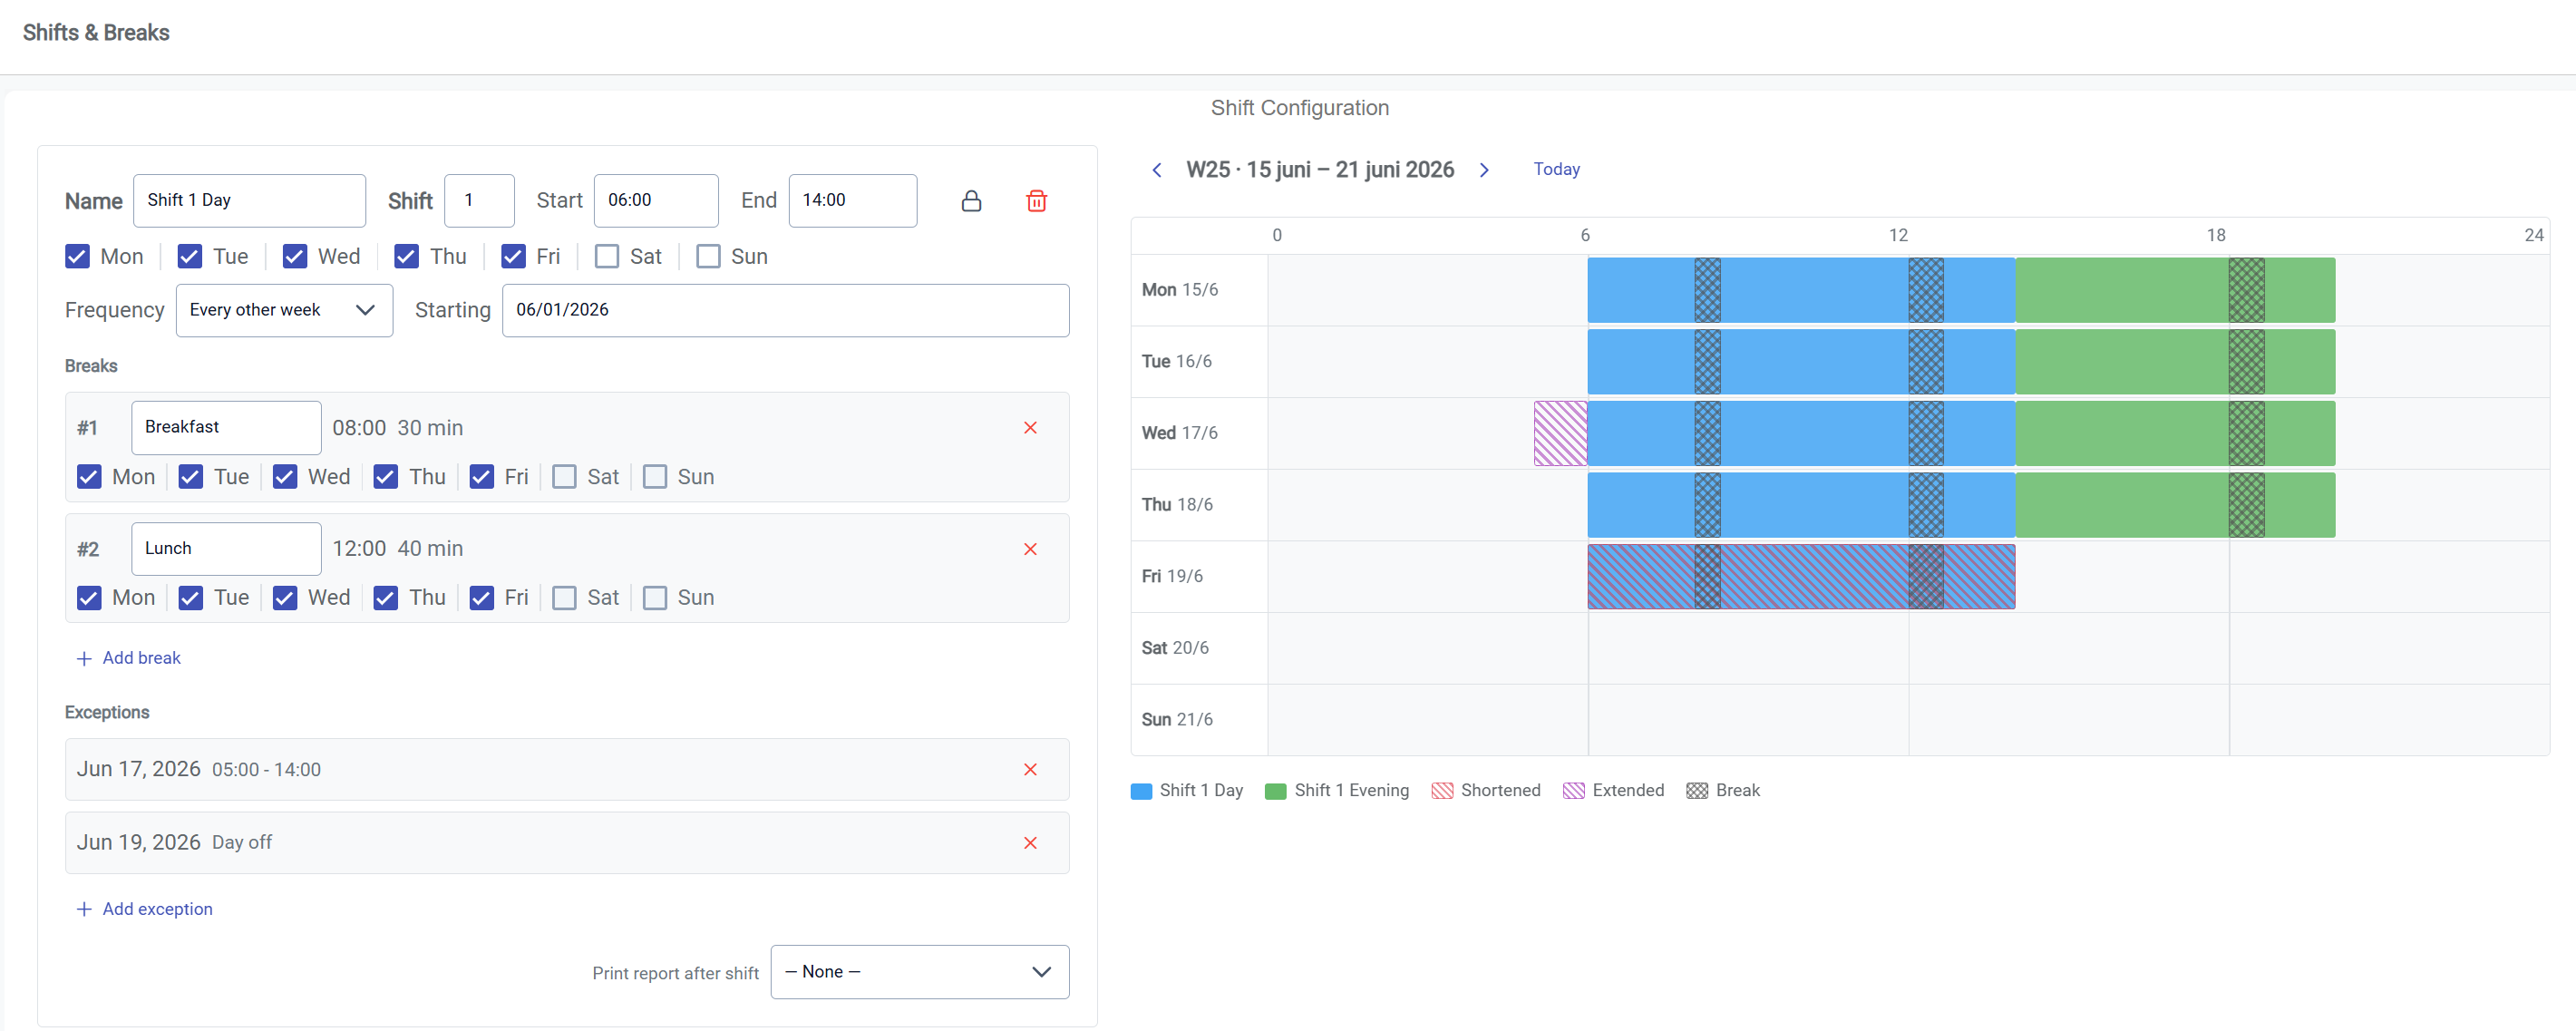
To compensate some of the time lost on midsummer, the staff are to start an hour earlier on Wednesday the 17th. This is visualized by the purple striped pattern before the normal shift starts on Wednesday.
7. Generating reports
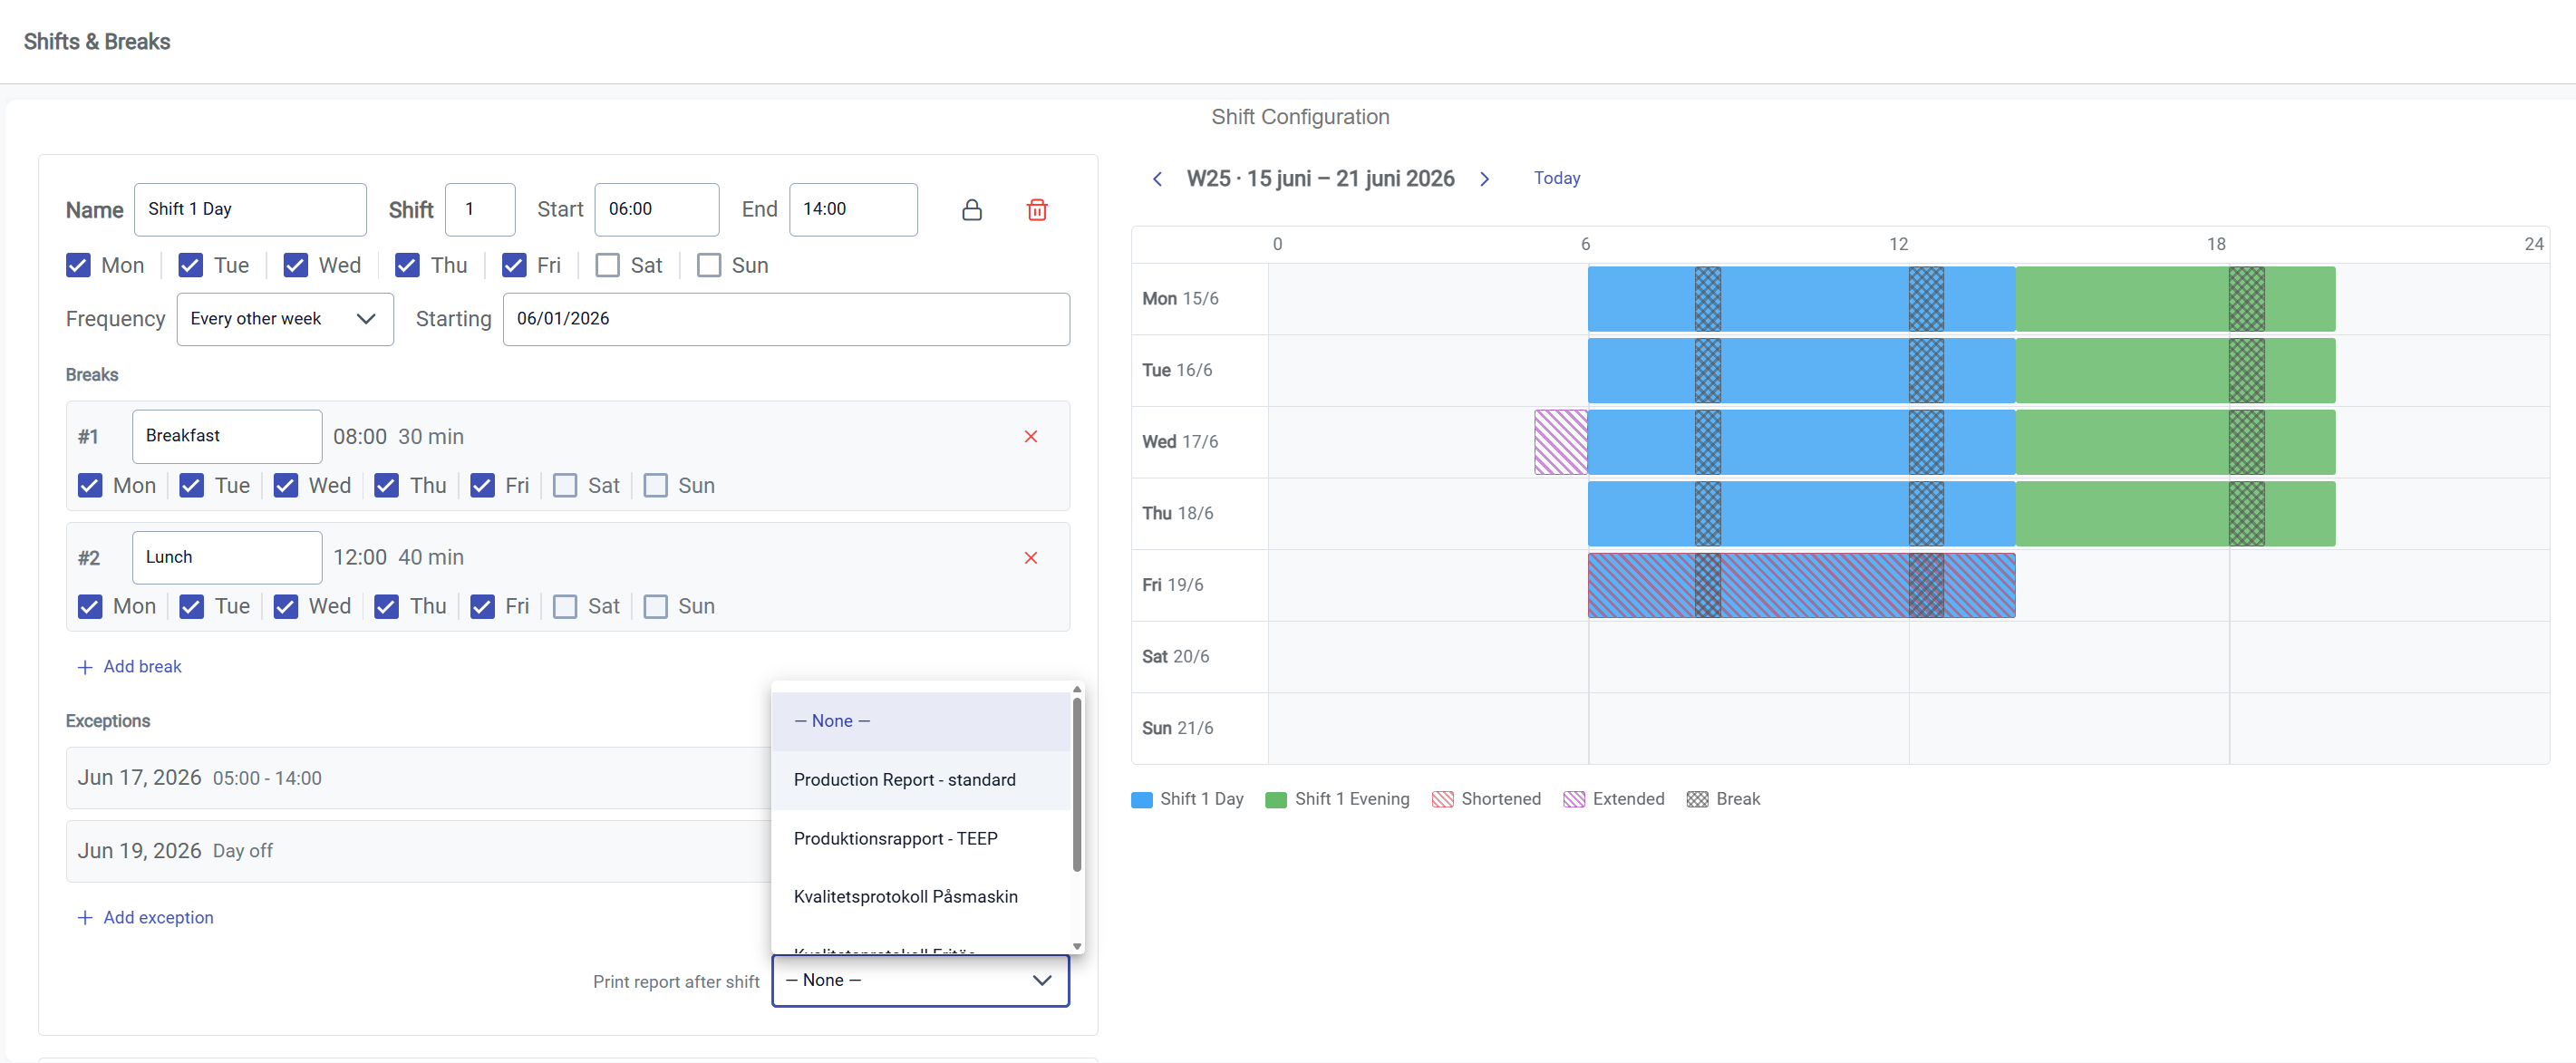
If a report is to be generated and distributed according to the shift schedule, the relevant report is simply selected in the Print report after shift dropdown on the related shift.
8. Applying changes
IMPORTANT: After creating a new schedule or making changes to an existing schedule, to actually apply the schedule to the machines you need to press Send to Gateway.